Migrating from Gmail to Office 365 can be a game-changer for individuals and businesses looking for enhanced collaboration, advanced features, and seamless integration with Microsoft tools. This article outlines everything you need to know about this migration, including manual methods, step-by-step instructions, and essential tips.
Whether you’re moving to leverage Office 365’s superior security features or to take advantage of its robust suite of productivity tools, planning and executing the migration correctly is crucial. This guide ensures a smooth transition with minimal downtime. By the end, you’ll have your Gmail data safely and Migrate Gmail to Office 365.
Table of Content
Why Migrate Gmail to Office 365?
- Centralized Productivity
Access emails, documents, and collaboration tools in one place.
- Seamless Integration
Works perfectly with Microsoft apps like Word, Excel, and Teams.
- Enhanced Email Features
Get advanced spam filtering, focused inbox, and more.
- Robust Security
Benefit from data encryption, compliance tools, and threat protection.
- Real-Time Collaboration
Co-author documents and share files with ease.
Multiple Methods to Migrate Gmail to Office 365
If your Gmail account has 2-step verification enabled, you’ll need to create and use an App Password instead of your regular password, and ensure that IMAP is enabled in Gmail. To learn how to set this up, refer to helpful resources on creating an app password and enabling IMAP in Gmail.
Now, let’s explore several methods for migrating Gmail to Office 365, allowing you to choose the one that best suits your needs, whether for small-scale personal migration or large-scale enterprise transitions.
1) Using Office 365 IMAP Migration to Move Gmail to Microsoft Office 365
In this method we’ll explains how to transfer Gmail data to Office 365 using the IMAP migration feature. Follow these steps to complete the process:
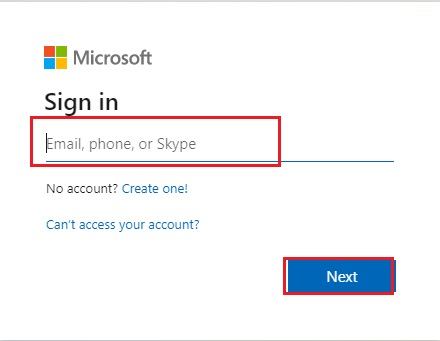
1. Go to admin.microsoft.com and log in with your Office 365 credentials.
Note: Full admin access is required to perform the migration.

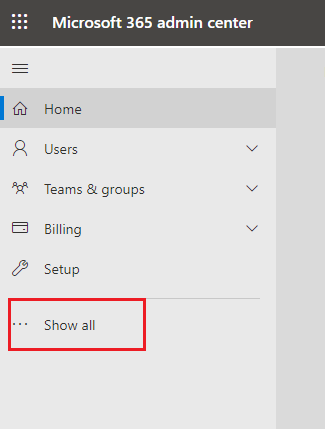
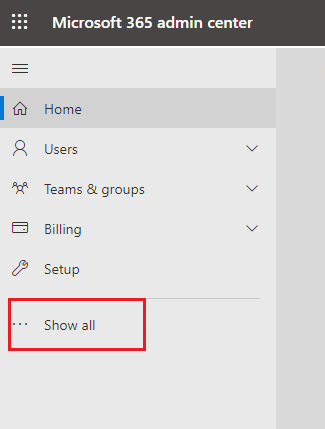
2. Log in to the Office 365 Admin Center and click on the “Show all” option which are on left panel to view the full menu.
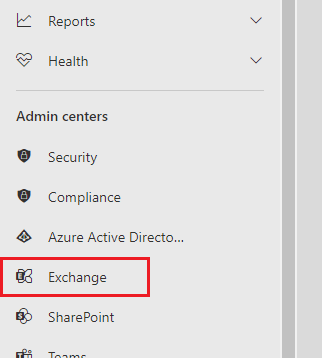
3. Click on Exchange, which will open a new tab displaying the Exchange Admin Center interface.
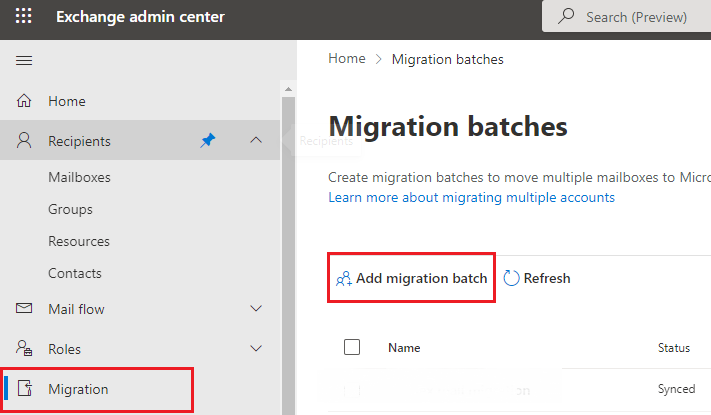
4. Navigate to Migration and select Add migration batch.
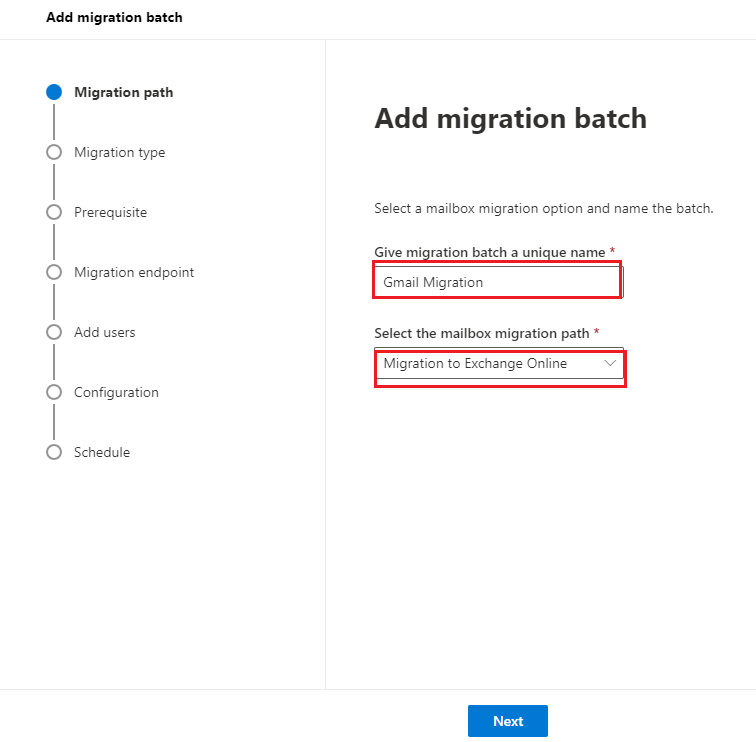
5. In the Add migration batch window, provide a batch name and choose Migration to Exchange Online for transferring Gmail to Office 365.
6. Select the migration type to IMAP migration and then click Next on the following screen process.
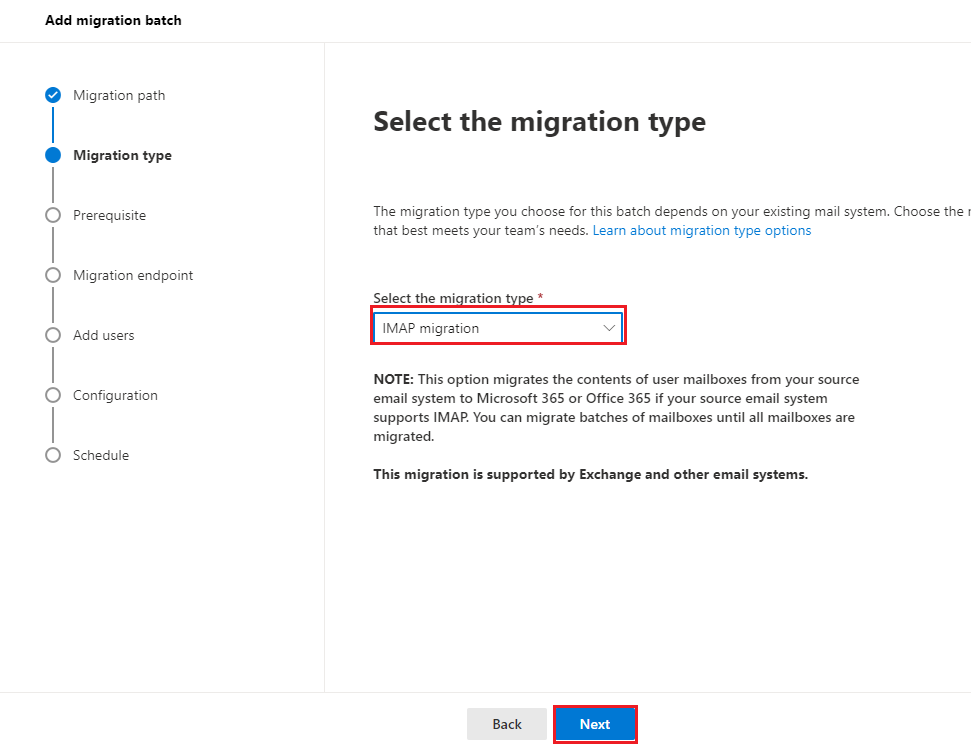
Note: Ensure that Office 365 user accounts are created beforehand.
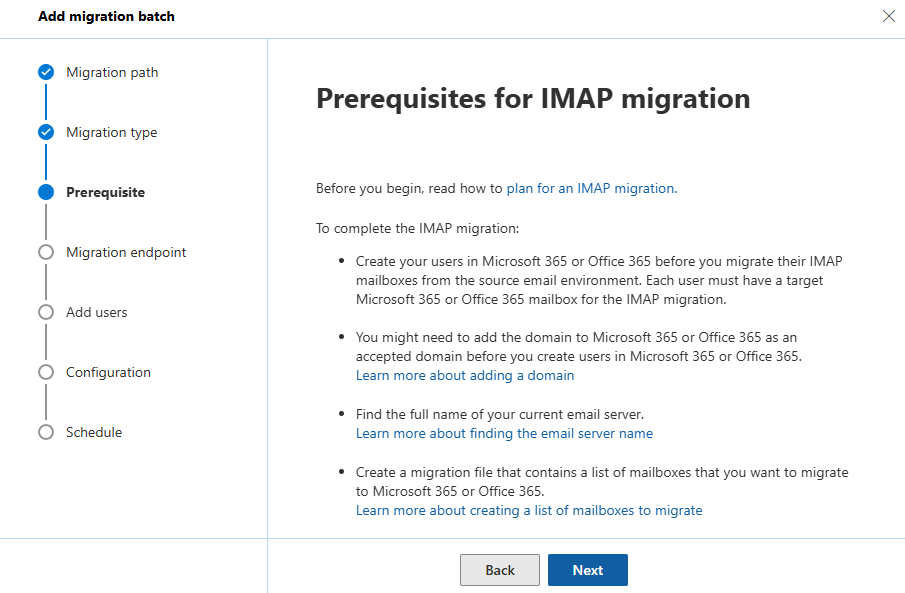
7. Before proceeding with IMAP migration, ensure prerequisites like creating Office 365 users, setting up domains, and preparing a migration file, as shown in the image.
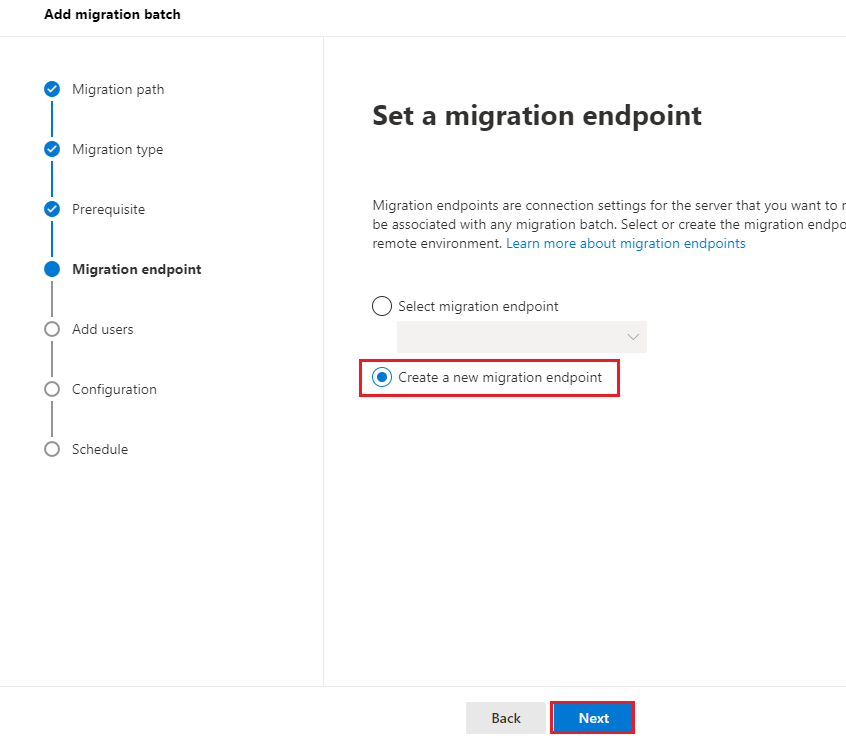
8. Choose Create a new endpoint and click Next.
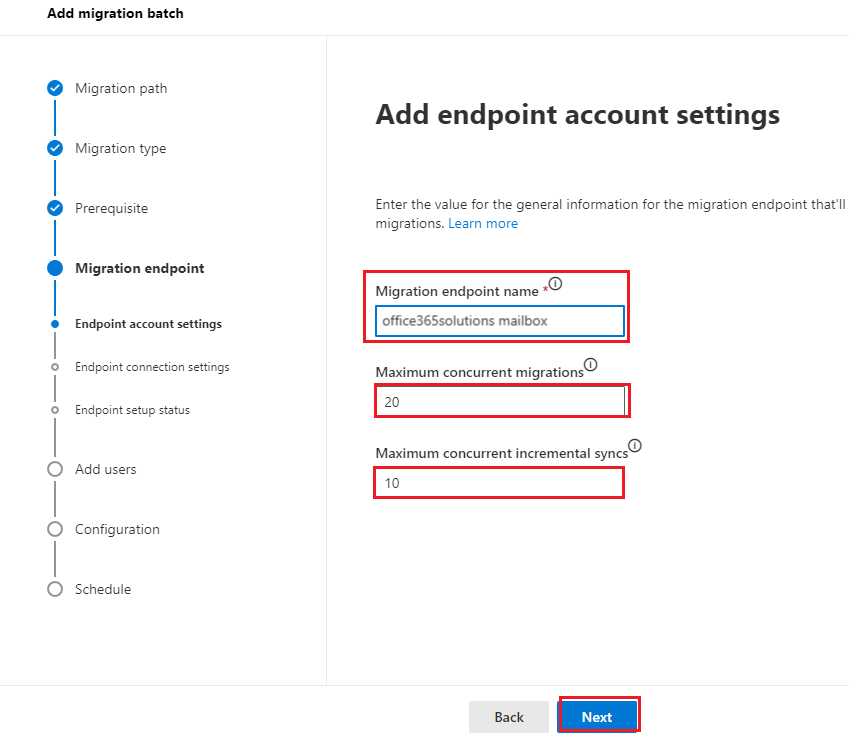
9. Provide an migration endpoint name, set the maximum number of concurrent migrations and maximum concurrent incremental syncs as per your needs, and then proceed.
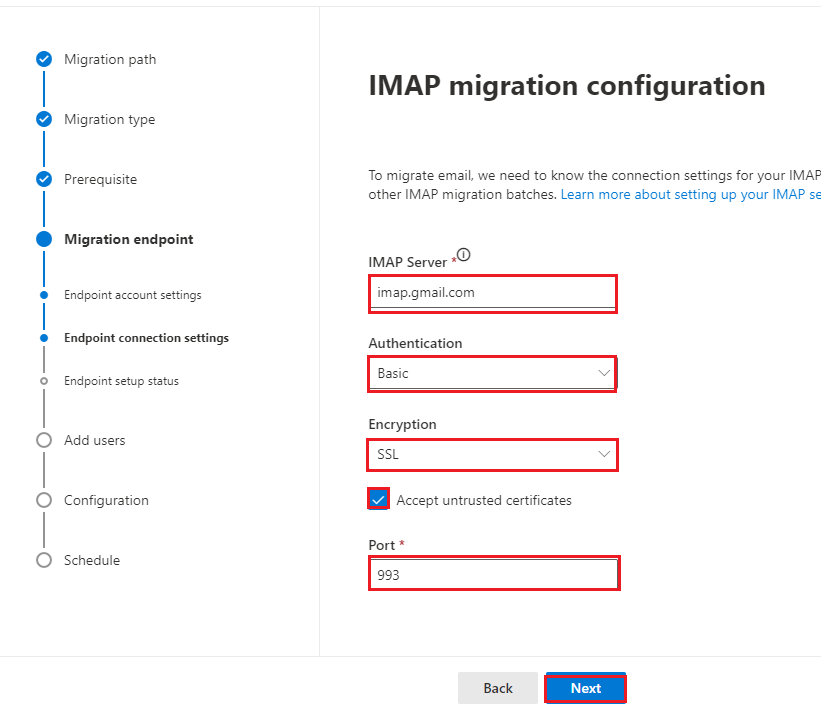
10. Enter the Gmail IMAP server details, including IMAP server authentication type, encryption, and port. Then click Next.
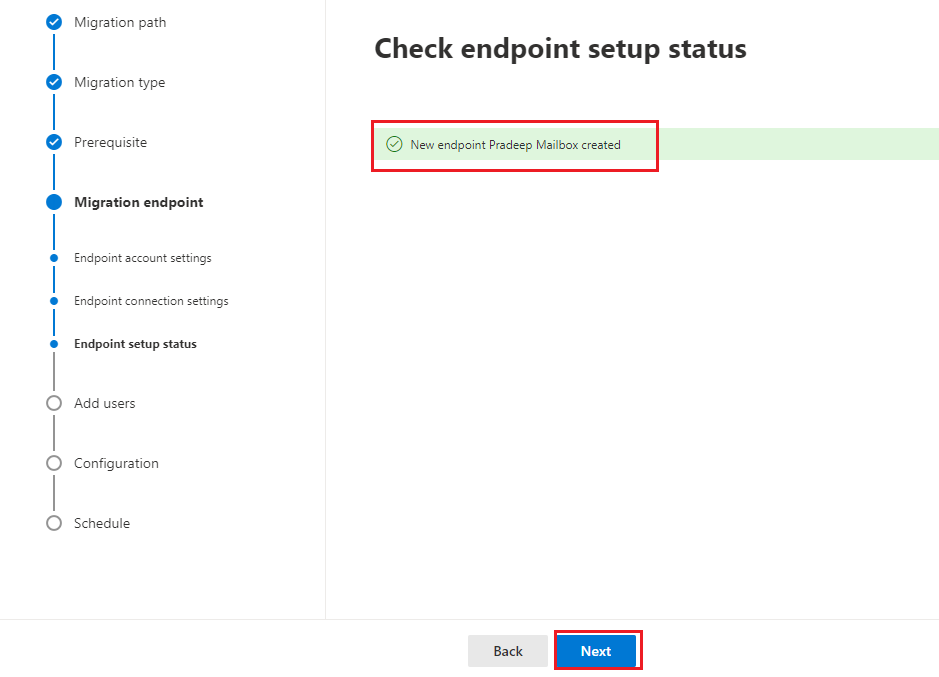
11. Once the new endpoint is created, click Next to proceed.
12. In the Add user mailboxes window, click on download a CSV file with headers and sample user information; it download the sample CSV file to view the required format.

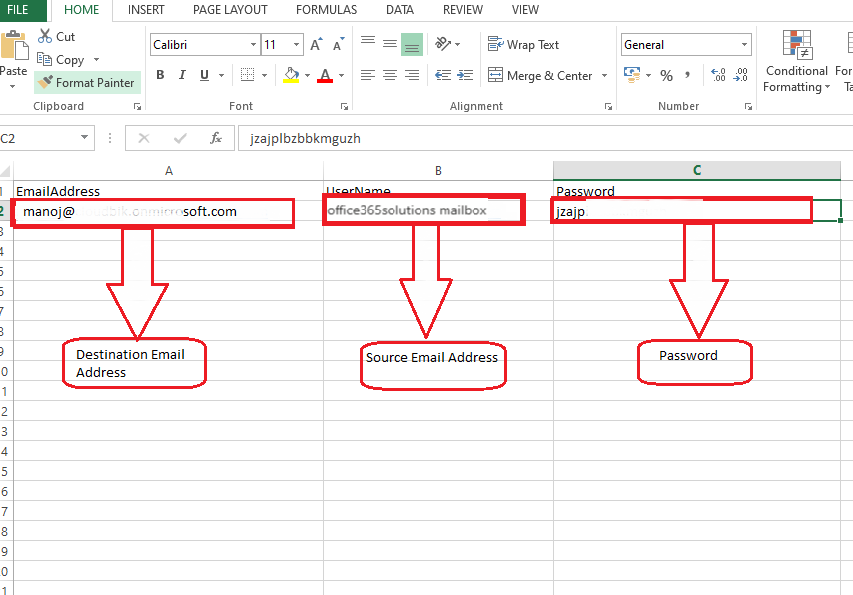
13. Fill in the Destination email address column with the user addresses where Gmail mailboxes will be migrated or Migrate Gmail to Office 365.
Enter the Gmail account’s email address (source email) in the second column.
In the third column, input the account password.
Note: If Gmail’s two-step verification is enabled, generate an app password and use it instead of the regular Gmail login password.
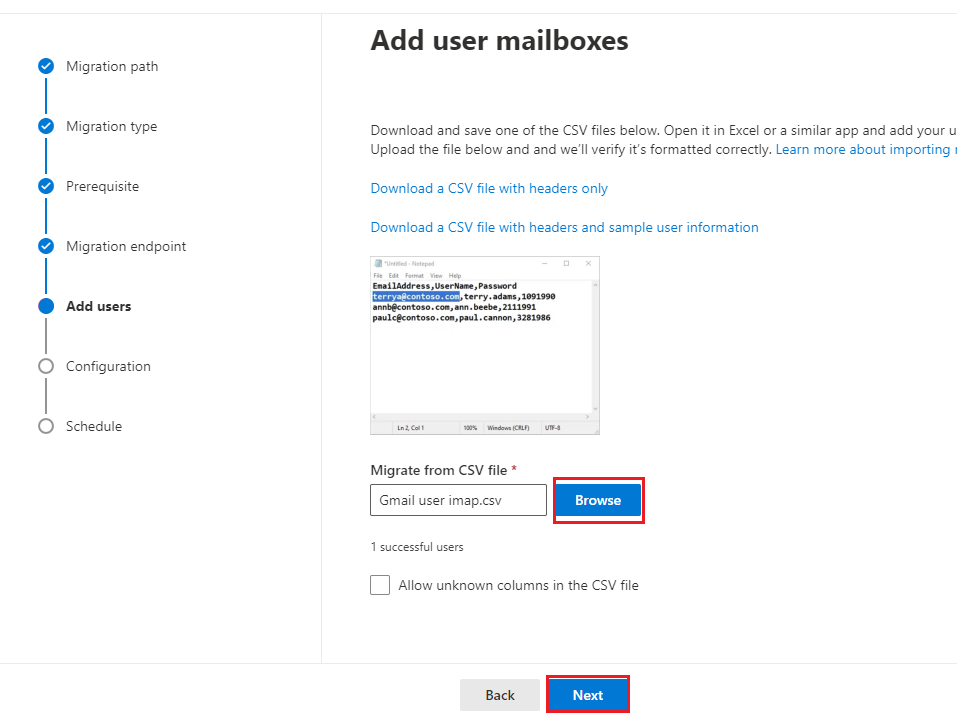
14. Click Browse to upload the CSV file and hit Next
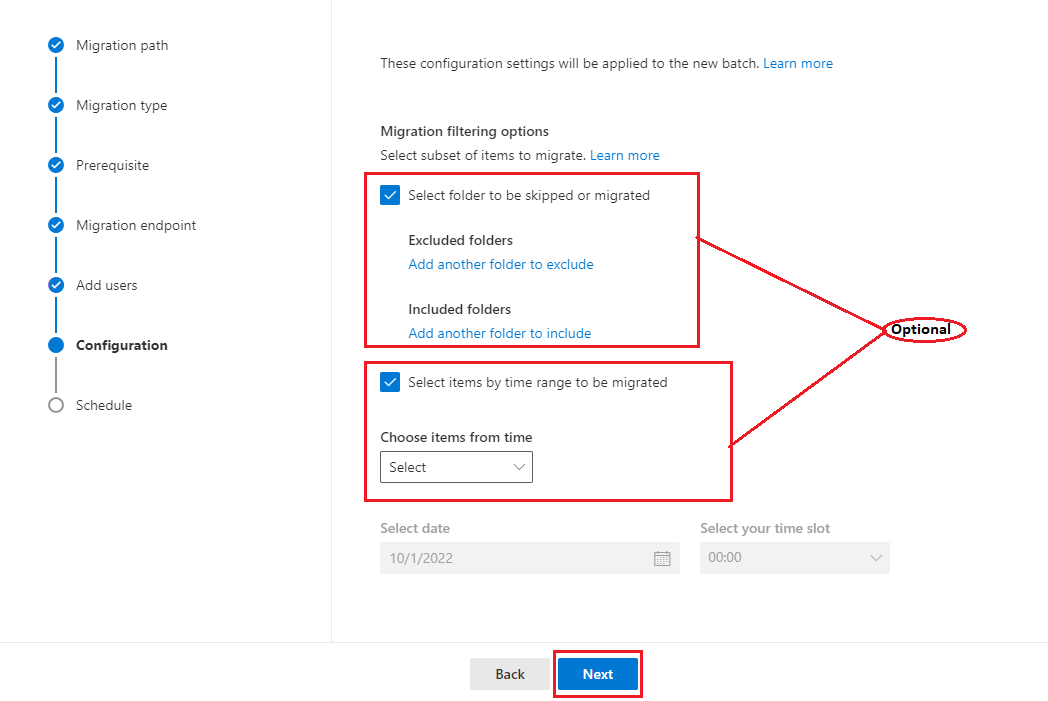
15. You can choose to skip certain folders or set a time range for migration, or leave those options unchecked. Proceed by clicking Next.
If you want to migrate emails from a specific time range, select the option for Time Range; otherwise, leave it as is.
Click Next to continue.
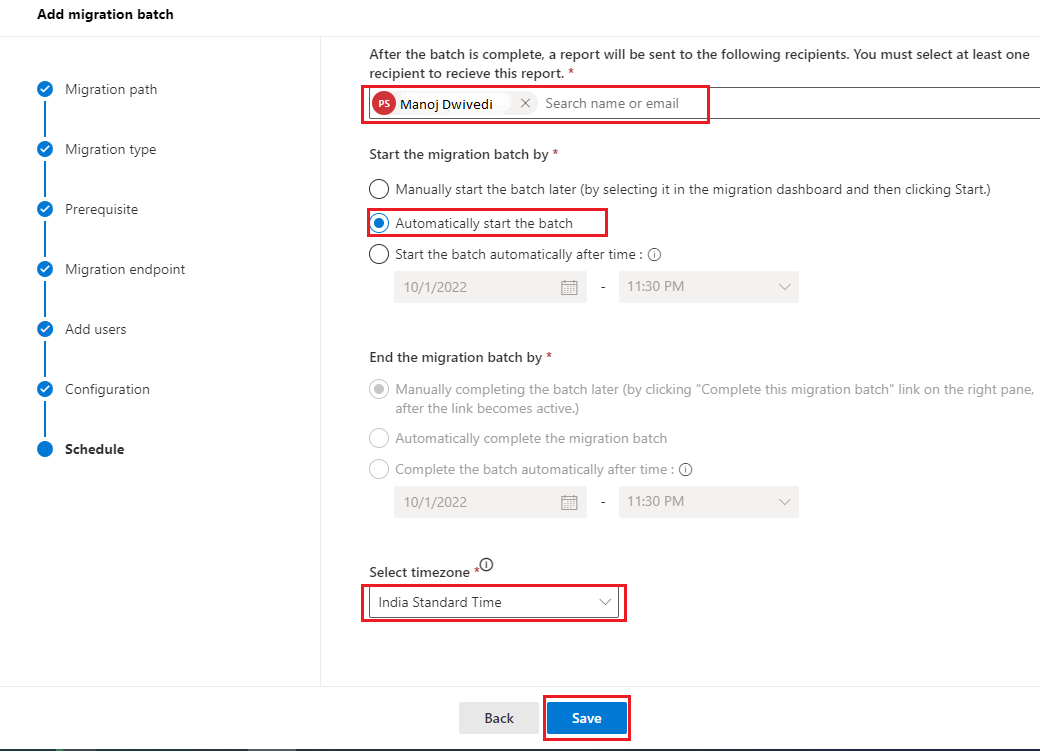
16. In the next window, select the user account for receiving the report or to send the reports.
You can opt to start the batch automatically or manually, and set a specific time for it. Don’t forget to choose your time zone and click Save.
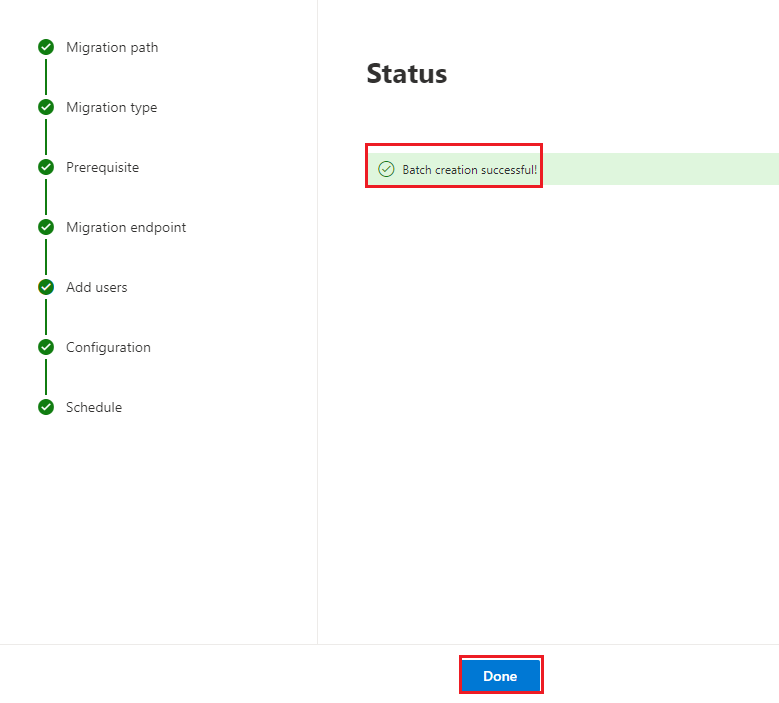
17. The batch will be created, and you’ll see its status. Once it’s done, click Done.
18. The batch will show as syncing, which may take about 5 minutes based on the data size.
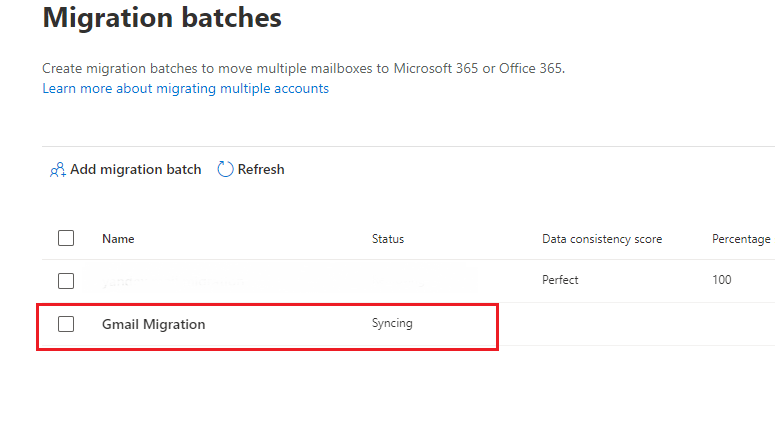
19. After some time, refresh the page to check if syncing is complete, and click the file to view the migration status.
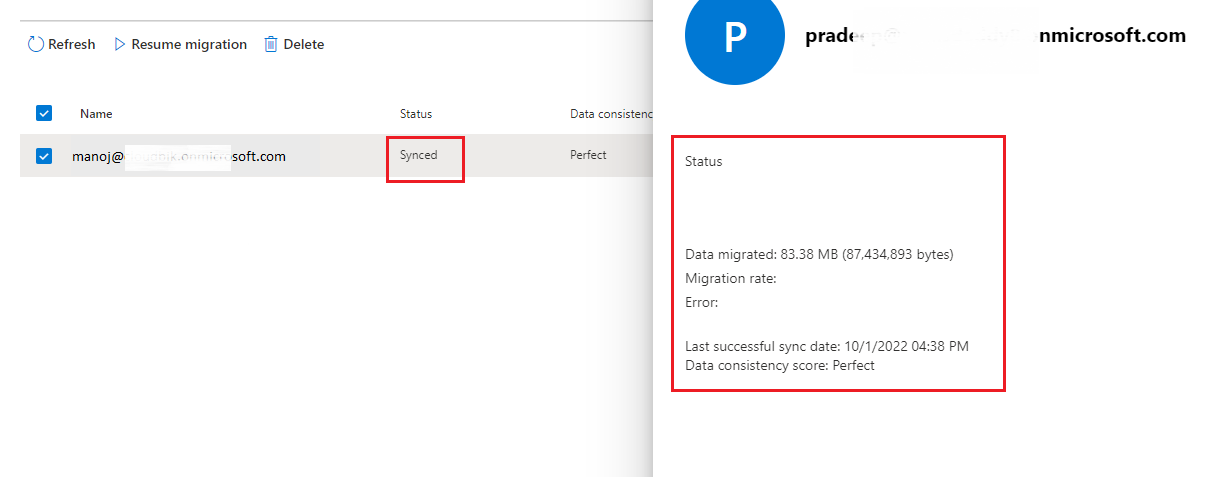
You have successfully completed the Gmail to Office 365 migration. The steps provided above should have helped guide you through the process.
Now, let’s move on to the second method for migrating Gmail to Office 365.
2) Migrating Gmail to Office 365 Using MS Outlook
One effective way to migrate Gmail to Office 365 is by leveraging Microsoft Outlook. This involves exporting Gmail data to a PST file and then importing the PST into Office 365. here is the step-by-step guide for the Migrating Gmail to Office 365 Using MS Outlook process:
- Configure Gmail in MS Outlook
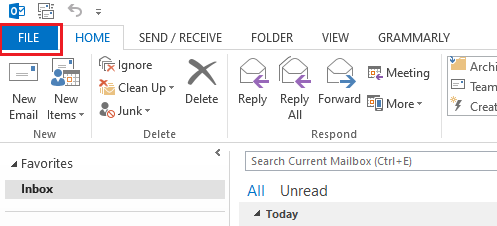
1. Launch the application and click on the File tab.
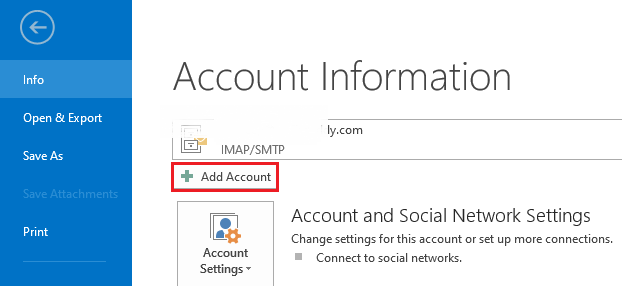
2 Choose “Add Account“: In the File menu, select the Add Account option.
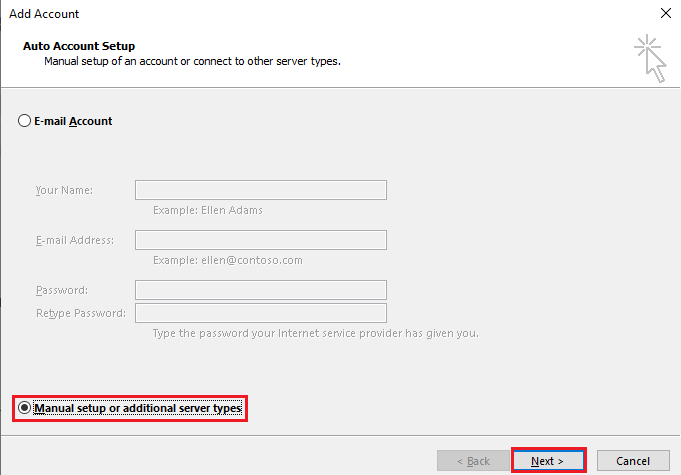
3. In the pop-up window, choose Manual Setup and click Next.
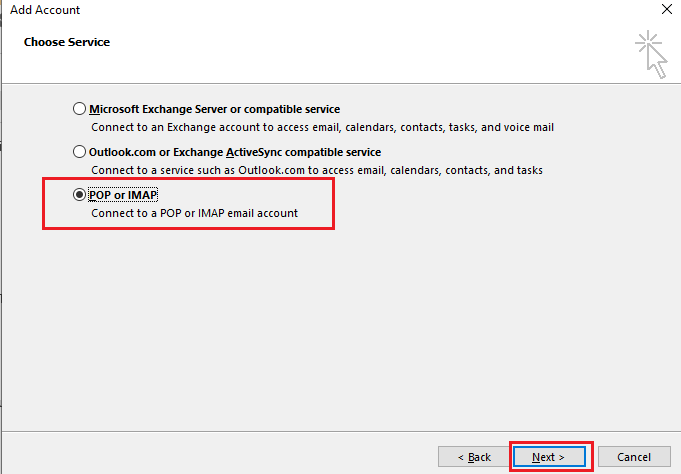
4. Select the POP or IMAP option, then click on Next.
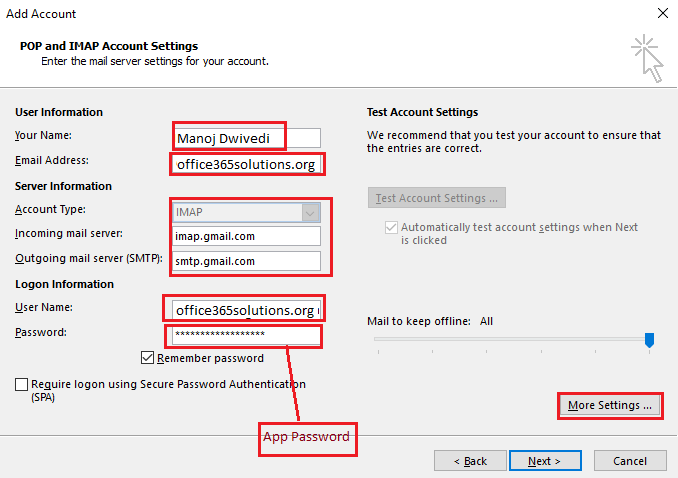
5. Enter the necessary details for your Gmail account as shown, then click on More Settings.
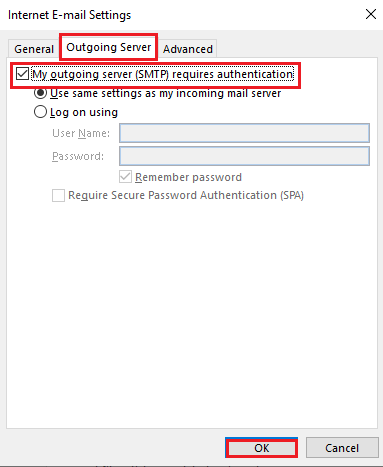
6. In the Internet Email Settings window, go to the Outgoing Server tab and enable the first option. Then, proceed to the Advanced tab.
7. In the Advanced tab, enter the appropriate settings for both the Incoming Server and Outgoing Server, then click OK.

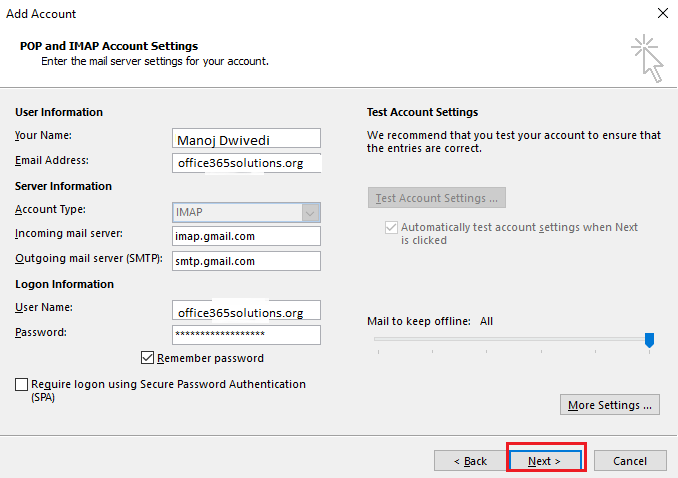
8. You’ll be taken back to the account setup screen. Select “Next” to start verifying the account settings.
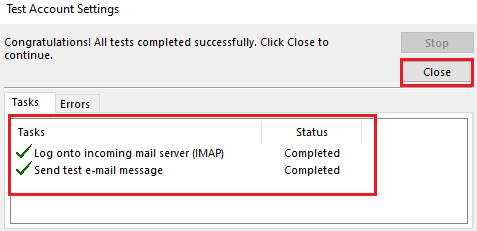
9. After completion, a status window will appear. Click Close when it shows as finished.
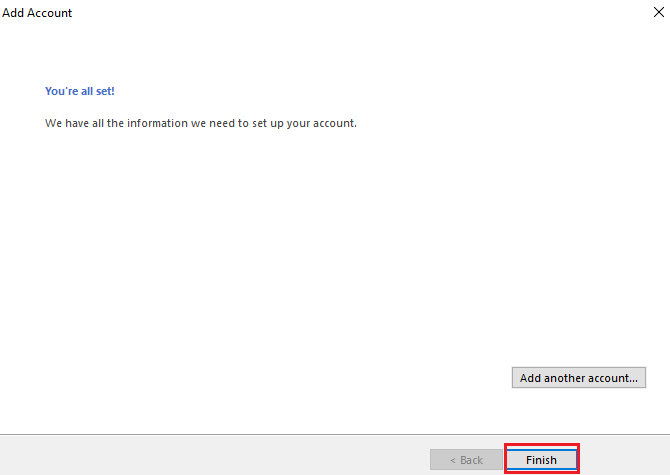
10. A confirmation window will appear, showing that the account has been successfully added. Click Finish.
Your Gmail account is now successfully configured in MS Outlook. Next, you need to create a PST file, which will contain your Gmail data for importing into Office 365. This file will enable you to transfer all your Gmail emails and other information smoothly into your Office 365 account.
- Export PST file from MS Outlook
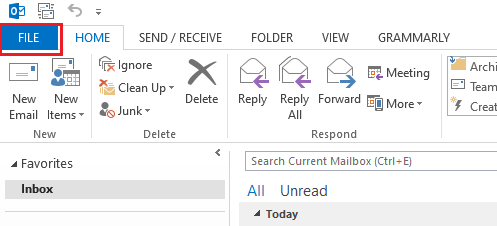
1. In MS Outlook, open the application and click on the File tab.
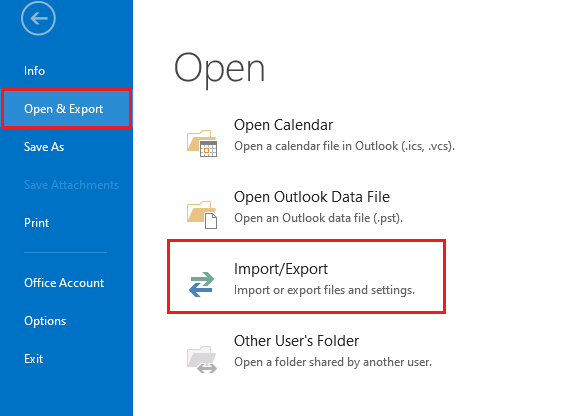
2. Under Open & Export, click on Import/Export.
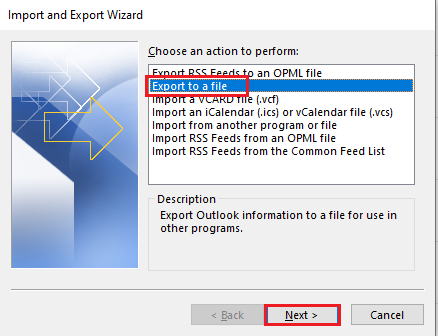
3. In the Import and Export Wizard, select Export to a file and click Next.
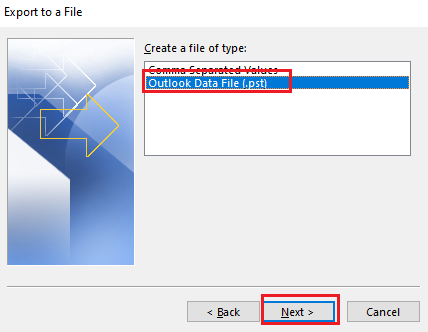
4. Choose Outlook Data File (.pst) and click Next.
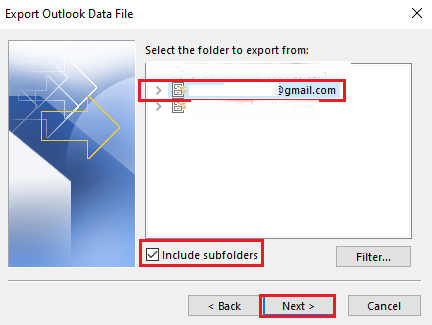
5. Select your Gmail account from the list and click Next.
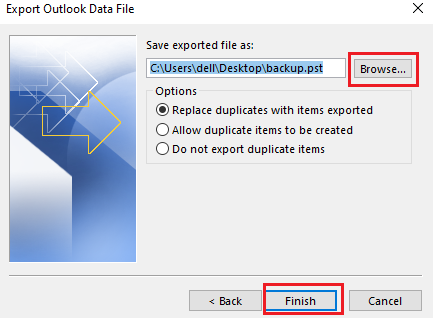
6. Choose a location to save the PST file and click Finish.
7. You can choose to add a password to the PST file for extra security (this step is optional). Click OK to proceed.
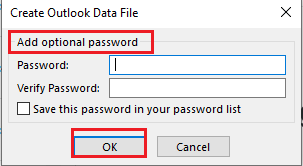
The PST file will be exported to the destination you selected. By following these steps, you’ve successfully created the Outlook PST file.
To complete the Gmail to Office 365 migration, the next step is to transfer this PST file into your Office 365 account. Once imported, all your Gmail data will be available in Office 365.
- Import Outlook PST into Office 365
You can import the Outlook PST file into Office 365 using two methods:
- Using the Network Upload Method
- Using MS Outlook Import/Export Wizard
Both methods are effective for migrating data into Office 365. You can follow the detailed steps outlined in this guide how to import your Outlook PST files into Office 365 and complete your Gmail to Office 365 migration.
Best Practices for a Smooth Gmail to Office 365 Migration
- Before migrating, ensure that all important Gmail data, including emails and contacts, are backed up to avoid data loss.
- Create all necessary Office 365 user accounts and ensure the domains are set up correctly for a smooth migration process.
- When using MS Outlook, ensure your Gmail account is configured properly with correct settings (IMAP enabled, two-step verification handled with app passwords).
- Regularly check the progress of your migration to address any potential issues early, especially during large-scale transfers.
- After the migration, verify the data in Office 365 to ensure everything, including emails, contacts, and calendars, has been transferred correctly.
Conclusion
Migrating from Gmail to Office 365 enhances productivity with better security and seamless integration with Microsoft tools. There are two primary methods to achieve this: IMAP Migration and MS Outlook. The IMAP Migration method involves using the Office 365 Admin Center to directly transfer Gmail data, making it suitable for businesses with multiple accounts. The Outlook method requires configuring Gmail in Outlook, exporting data to a PST file, and then importing it into Office 365, ideal for individual users or small teams. Both methods ensure a secure, smooth transition, migrating emails, contacts, and calendars into Office 365.
