When adding new users to Microsoft Office 365, the next essential step is assigning them the necessary licenses to access various services of Microsoft Office 365. Normally, we can Assign License through the admin center but we can also do it using powershell.
In this guide, we’ll walk you through both methods, ensuring you can efficiently assign license Office 365 to new users while verifying availability and managing licenses effectively. But before diving into the step-by-step process, we need to check whether the licenses are available or not.
Table of Content
How to Check the Available Licenses in Office 365?
We can check the available license via the Exchange admin center and Powershell. For powershell, first, we have to connect with Microsoft Graph.
- For connecting the Microsoft Graph, run the command:
Connect-MgGraph -Scopes User.ReadWrite.All, Organization.Read.All
- To check the available licenses through Powershell
Get-MgSubscribedSku | Select -Property Sku*, ConsumedUnits -ExpandProperty PrepaidUnits | Format-List
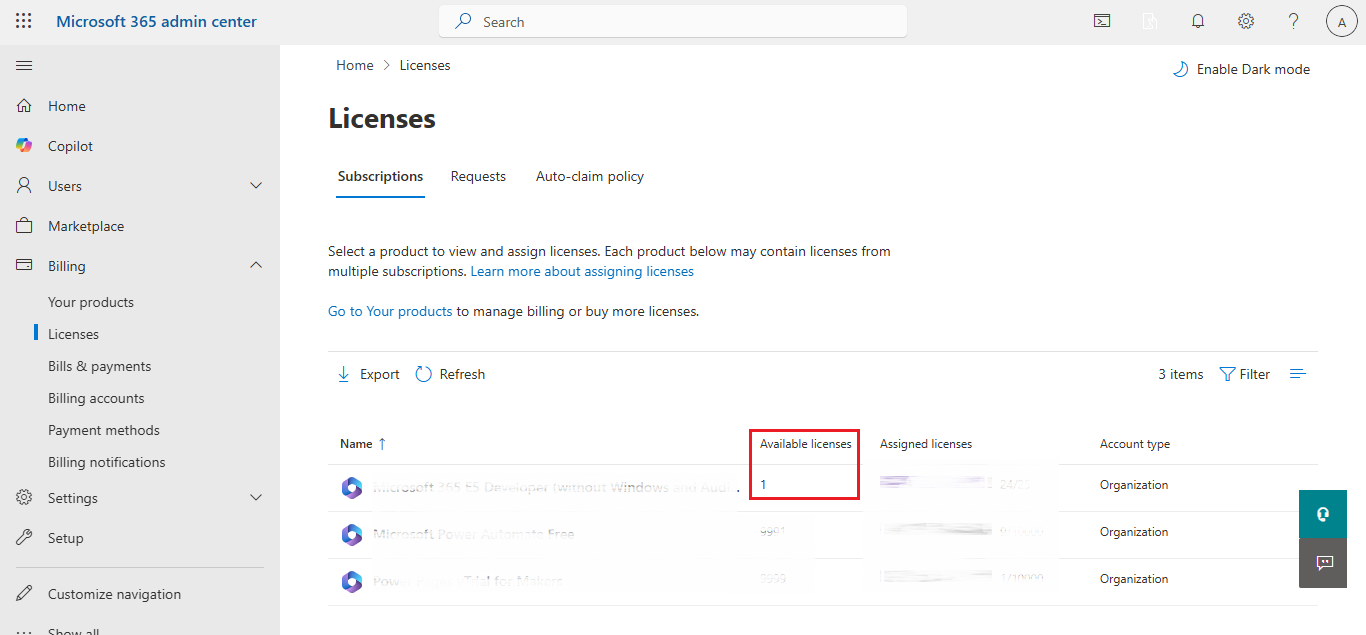
- Also, check the license through the admin center
You can check by login in Microsoft Office 365 then go to Billing > Licenses. Check the highlighted area to view available licenses.
Steps to Assign License to the Users in Microsoft 365
There are two methods to assign license to users in Microsoft Office 365. By using these you can not only add a single user but also add multiple users at a time.
– Admin Center
– Powershell
Assign License by using Admin Center
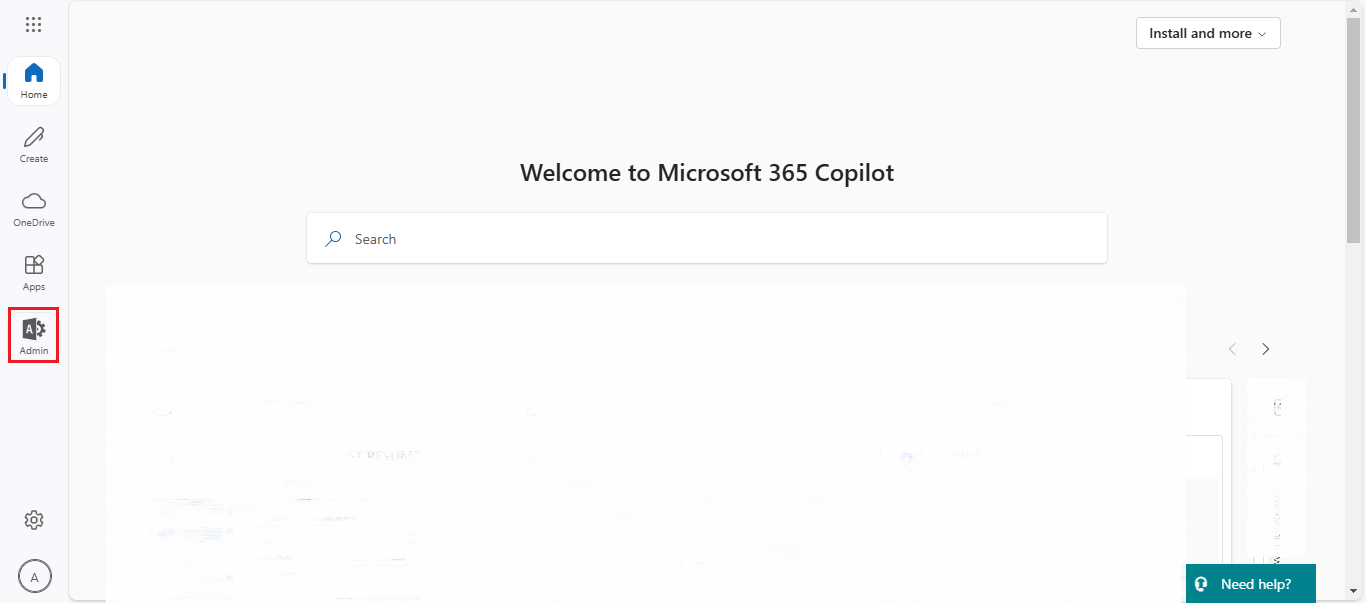
1. Open office365 and click on Admin
2. Go to Billing option, then choose Licenses
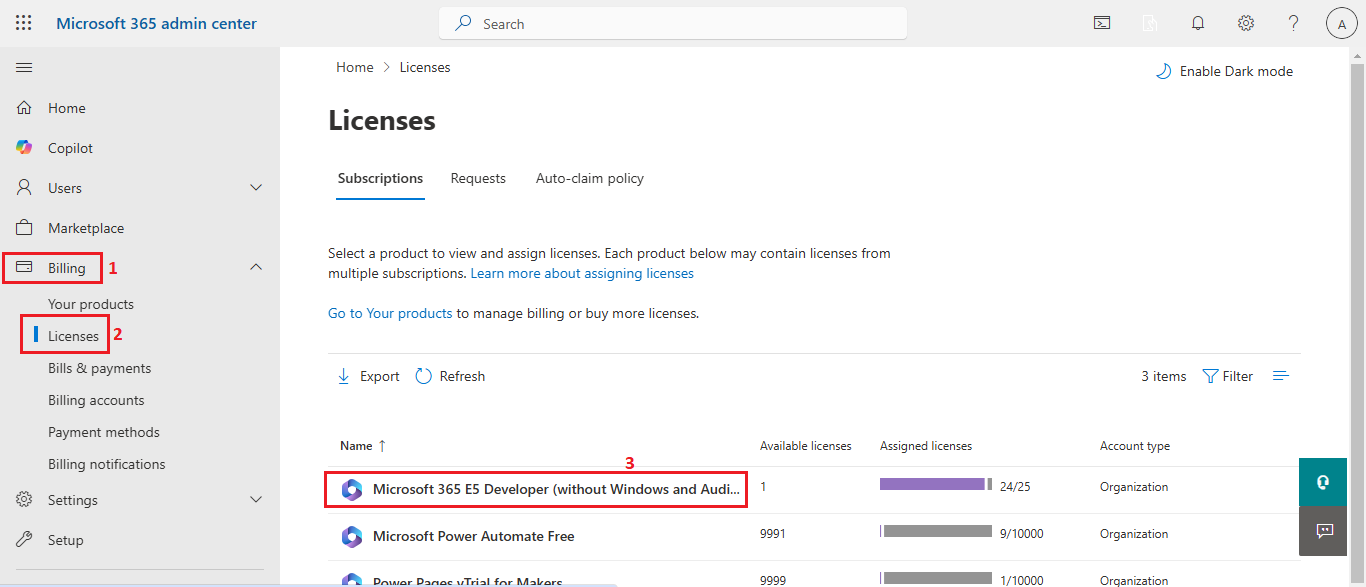
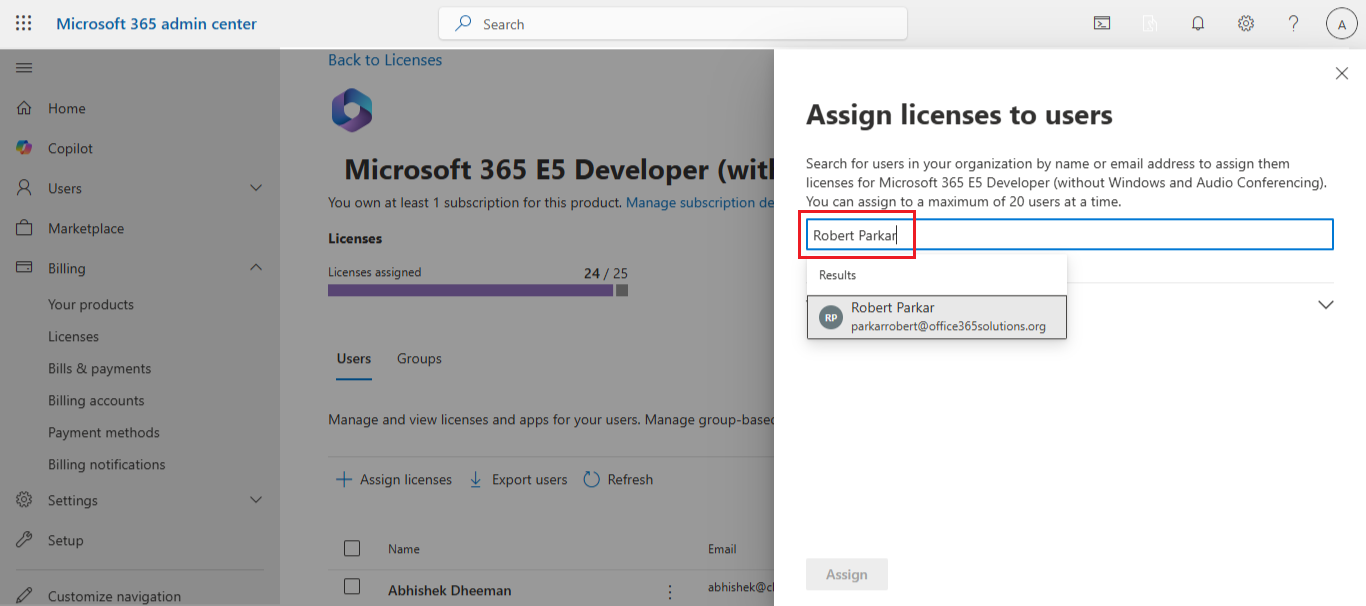
3. Now select the Assign Licenses option
4. A search bar will appear, now search the user that you want to assign the licenses
5. Click on Assign Button
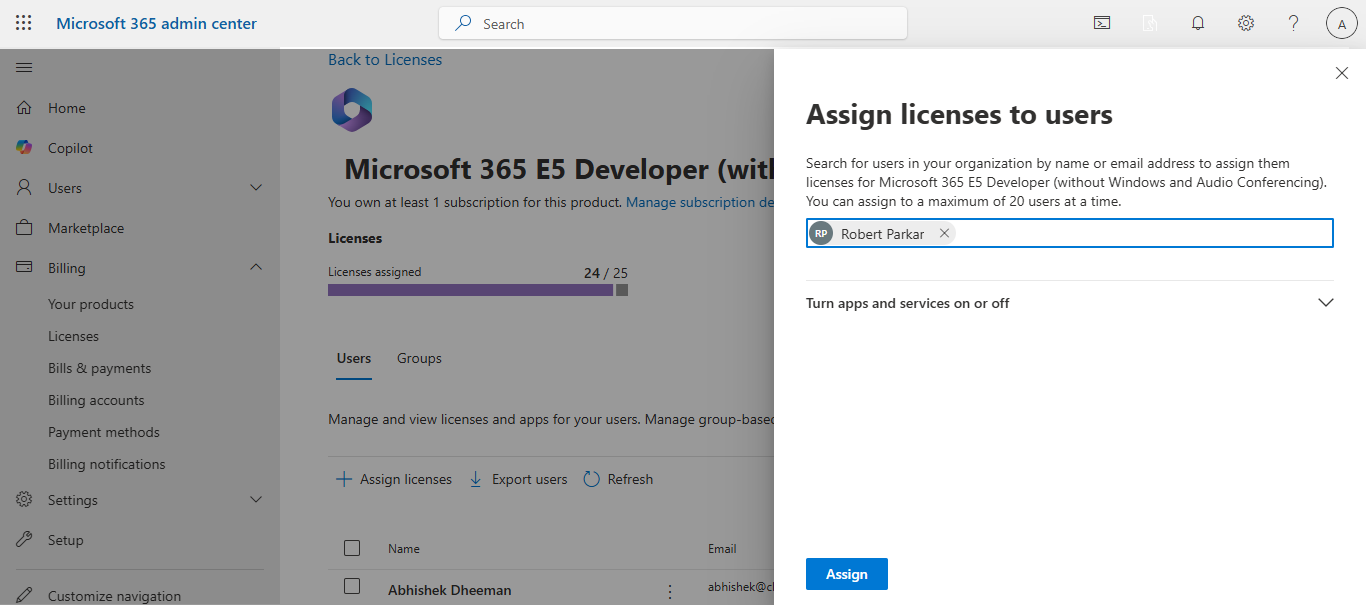
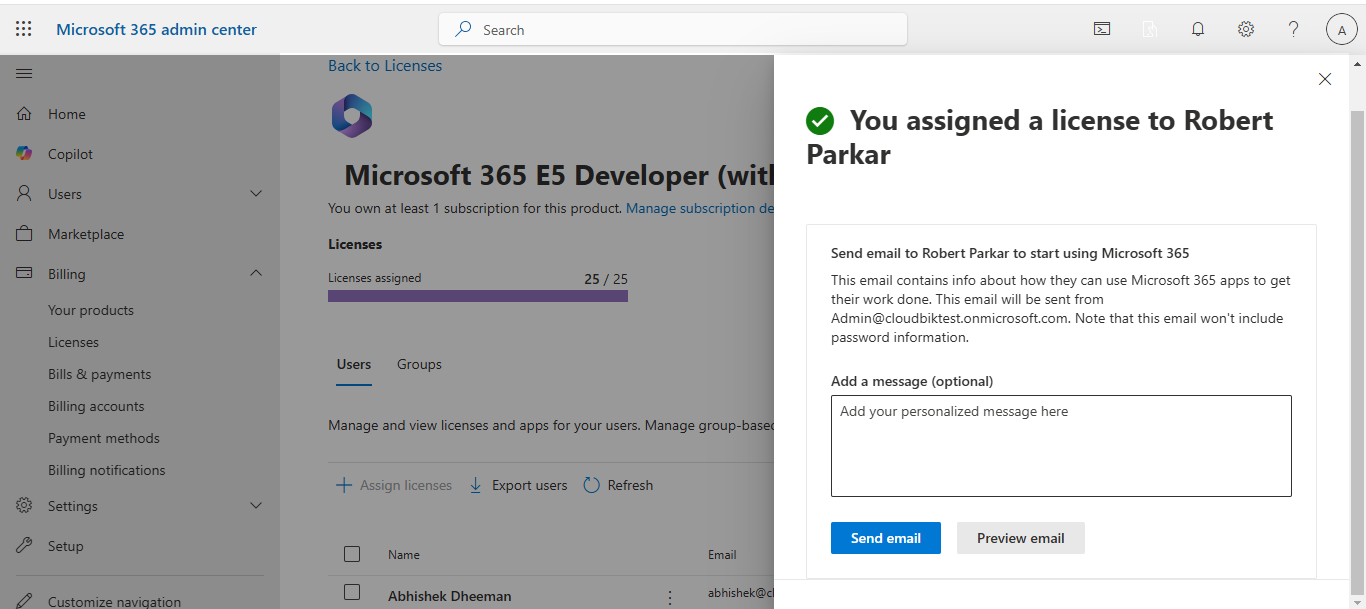
6 . You are Done! The license is assigned
7. To verify whether the license is assigned or not > Go to Users, choose Active Users then Click on the search bar and type the user name.
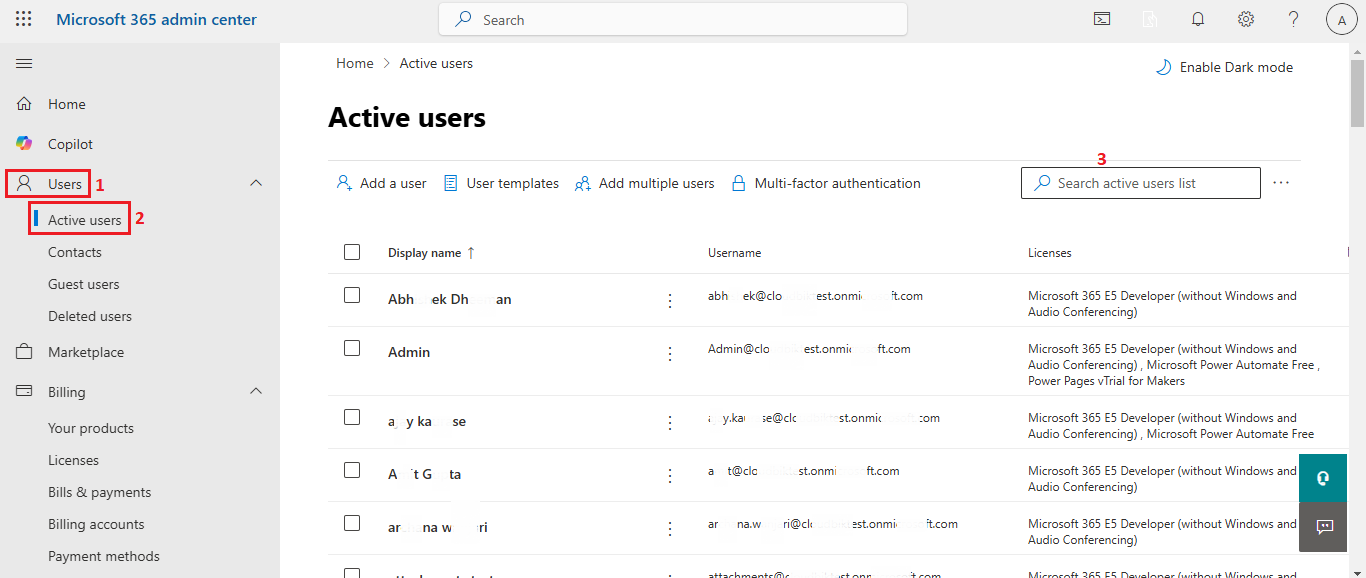
8. The license has been assigned as shown below in the image

Assign License by using Powershell
– Assigning the License for a Single User
To assign the license for a single user run the below command:
$e5Sku = Get-MgSubscribedSku -All | Where SkuPartNumber -eq 'DEVELOPERPACK_E5'
    Set-MgUserLicense -UserId $newUser.Id -AddLicenses @{SkuId = c42b9cae-ea4f-4ab7-9717-81576235ccac} -RemoveLicenses @()
}

# Export the results to a CSV file
$users | Export-Csv -Path "C:\Users\office365solutions\Downloads\exportdata.csv" -NoTypeInformation
– Assigning the License for a Multiple User
To allocate licenses to multiple users, first, they need to create a dedicated CSV file filling in all the required details as follows:
UserPrinciplename, DisplayName, FirstName, LastName, JobTitle, Department, LicenseSkuId

Now run the below command for assigning the license for user:
# Import the CSV file
$users = Import-Csv -Path "C:\Users\office365solutions\Downloads\users.csv"
# Loop through each user in the CSV file
foreach ($user in $users) {
# Create a new user
$newUser = New-MgUser -UserPrincipalName $user.UserPrincipalName `
-DisplayName $user.DisplayName `
-GivenName $user.FirstName `
-Surname $user.LastName `
-JobTitle $user.JobTitle `
-Department $user.Department `
-AccountEnabled `
-MailNickname ($user.UserPrincipalName.Split('@')[0]) `
-PasswordProfile @{ForceChangePasswordNextSignIn = $true; Password = "TempPassword123!"}
# Set UsageLocation (required for license assignment)
Update-MgUser -UserId $newUser.Id -UsageLocation "IN"
Note: Change the usage Location like IN, US, UK etc according to your country.
How to Unassign the User License in Office 365?
Through the Admin Center
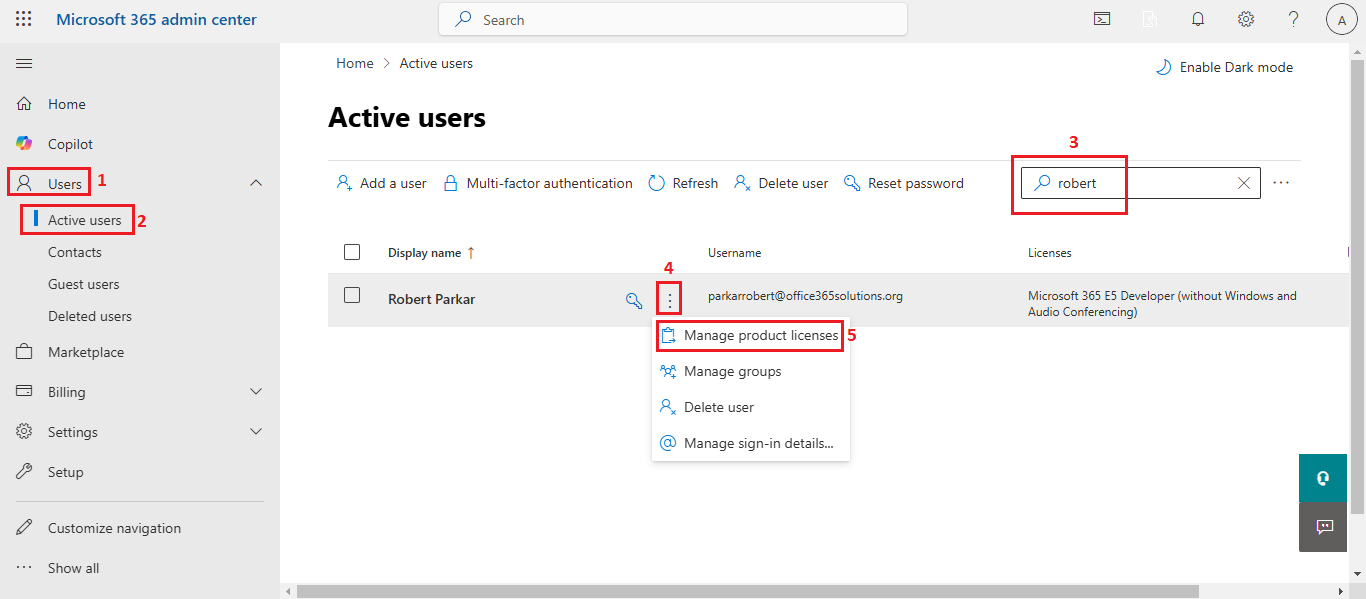
1. Open Microsoft 365 Admin Center, select Users then click on Active Users. Navigate to the search bar and search the user by name. Now click on 3 dots and select Manage Product Licenses option
2. Now uncheck the box
3. Click on Save Changes
4. Now you will see the license is unassigned successfully
5. We can also verify by searching the user name in the search bar, now you see the user is unlicensed.
Note: For techies and professionals, we can also use powershell command to unassign the user license.
Unassigned the Multiple License by using the Powershell
1. Create a csv file by including the:
UserPrinciplename, DisplayName, FirstName, LastName, JobTitle, Department,
LicenseSkuId
2. Connect to M365 Graph, update the CSV path, and execute
# Connect to Microsoft Graph
Connect-MgGraph -Scopes "User.ReadWrite.All"

# Define the CSV file path
$csvPath = "C:\Users\office365solutions\Documents\userx.csv"

# Import CSV file
$users = Import-Csv -Path $csvPath

# Loop through each user in the CSV
foreach ($user in $users) {
# Check if the UserPrincipalName and SkuId are valid
if ($user.UserPrincipalName -and $user.SkuId) {
try {
# Remove the specified license from the user
Set-MgUserLicense -UserId $user.UserPrincipalName -AddLicenses @() -RemoveLicenses @([guid]$user.SkuId)
Write-Host "License removed from $($user.UserPrincipalName)"
}
catch { Write-Host "Error removing license from $($user.UserPrincipalName): $_" } }
else { Write-Host "Missing UserPrincipalName or SkuId for $($user)" } }
}
Conclusion
Assigning licenses to users in Microsoft Office 365 is a crucial step in managing user access to various Microsoft services. Depending on the administrator’s preference and the number of users involved, it can be done efficiently using the Admin Center or PowerShell. In this article, we have discussed how you can successfully assign licenses to single users as well as in bulk. By following this step-by-step guide, administrators can efficiently assign and manage licenses while ensuring smooth operations and compliance in the Microsoft 365 environment.


