When it comes to migrating Exchange mailboxes to Office 365, and the number of mailboxes to migrate is also high, in this scenario, we have to use Exchange staged migration. This process will helps us to perform these migrations smoothly, simply, and efficiently. The term staged migration means, the data is migrated in batches and not all at once. In this article, we have discussed “how to export Exchange mailboxes to Office 365 using staged migration”, Also, the prerequisites and staged migration.
What is Exchange Staged Migration?
Staged Migration is a method used to move email accounts (called mailboxes) from an older version of Microsoft Exchange Server (like Exchange 2003 or 2007) to Microsoft 365 (Office 365). Instead of moving all users at the same time, the migration happens in small groups or batches, one at a time.
IT admins can manage users as per their preference, monitor the process, and move on to the next batch after forwarding the first batch.
When do we need to use the Staged Migration?
In the following conditions, we require the staged migration:
- Your organization is using Exchange Server 2003 or 2007
- You want to move mailboxes in phases (not all at once)
- Plan to move all users to Microsoft 365 permanently
Pre-Requisites for Exchange Staged Migration
- Exchange Server must be Exchange 2003 or 2007, and a valid Microsoft 365 (Office 365) tenant should be set up.
- Your domain is added and verified in Microsoft 365, and Azure AD Connect is installed to sync users and passwords
- Mailboxes must be hosted on-premises (not in hybrid or other systems)
- The Exchange server must have a valid SSL certificate installed
- Exchange Web Services (EWS) must be connected to the Internet
- Prepare a CSV file with user email addresses for migration batches, and assign proper Microsoft 365 licenses to each migrated user
- Be ready to update DNS (MX) records after final migration, and inform users about the migration and Outlook reconfiguration
Staged Migration Process For Exchange Mailboxes to Office 365
To complete the exchange staged migration process from Exchange mailboxes to Office 365, follow the steps below:
Step-1: Add Your Domain to Microsoft 365
- Go to admin.microsoft.com and sign in with your admin account, then go to Setup > Domains
- Clicked on the “Add Domain” icon, and enter your domain name (e.g. yourcompany.com)
- Microsoft will ask you to verify ownership by adding a TXT record to your domain’s DNS settings (your domain provider, like GoDaddy or Namecheap).
- Once verified, Microsoft will give you DNS settings to update:
- MX record (for mail)
- CNAME, TXT records
- Copy and paste these into your domain settings to point mail and services to Microsoft 365.
Step-2: Prepare Your On-Premises Server
- Download the Azure AD Connect from the Microsoft website and install it on your system.
- This tool copies all your users (and passwords) from your old server (Active Directory) to Microsoft 365.
- Go to Exchange Admin Center in Microsoft 365, then click on Recipients > Migration > More > Migration Endpoints
- Click “New” and choose Outlook Anywhere
- Enter your on-premises Exchange server details to create the connection between the two systems
Step-3: Set Up Mail Flow
- Make sure your emails are flowing correctly (from and to users). Try sending test emails to confirm delivery.
- During the migration, some users will still be on the old server, and some will be on Microsoft 365.
- Make sure both can send and receive emails without issues.
Step-4: Start Moving Mailboxes
- Open and log in to Microsoft 365 with your credentials, then go to admin
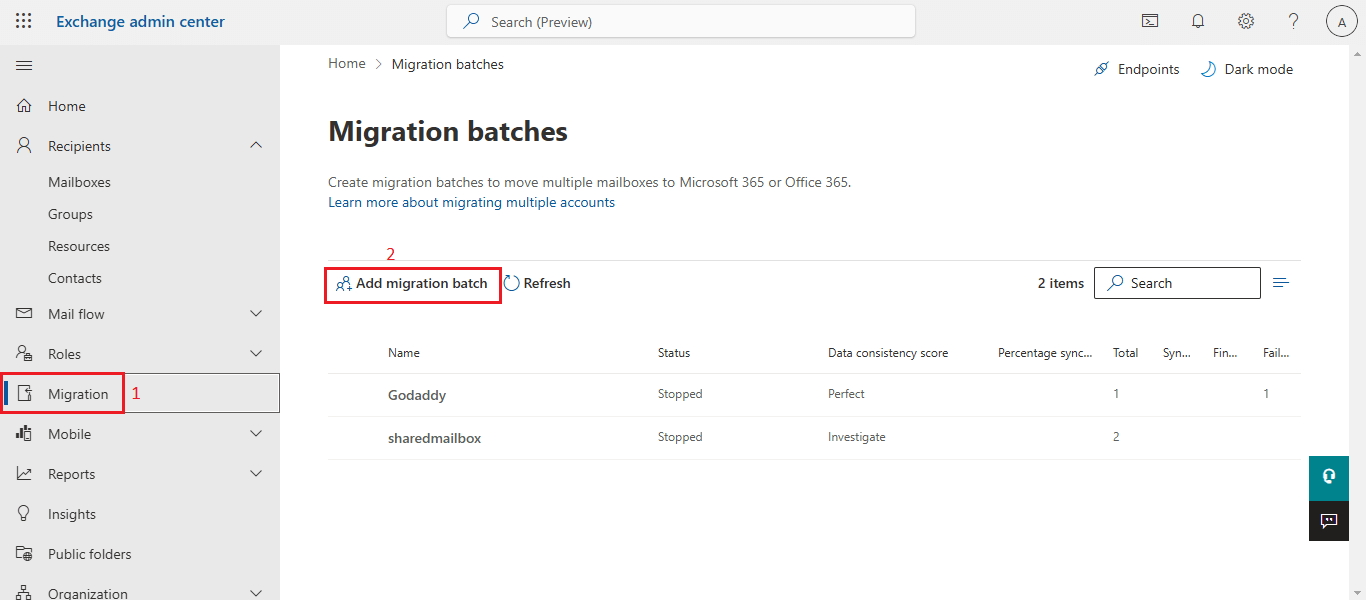
- In Exchange Admin Center, go to Migration, then click on Add migration batch
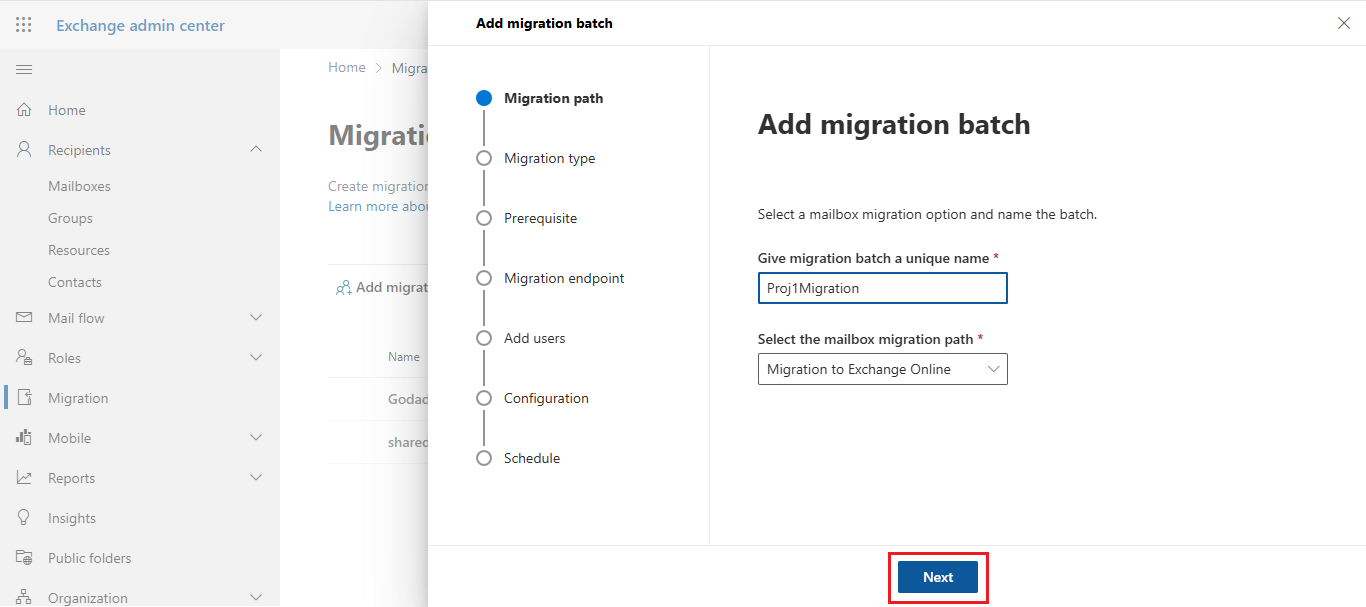
- Give a Unique name for your batch migration, and then click Next
- Now choose the staged migration option and then click on Next
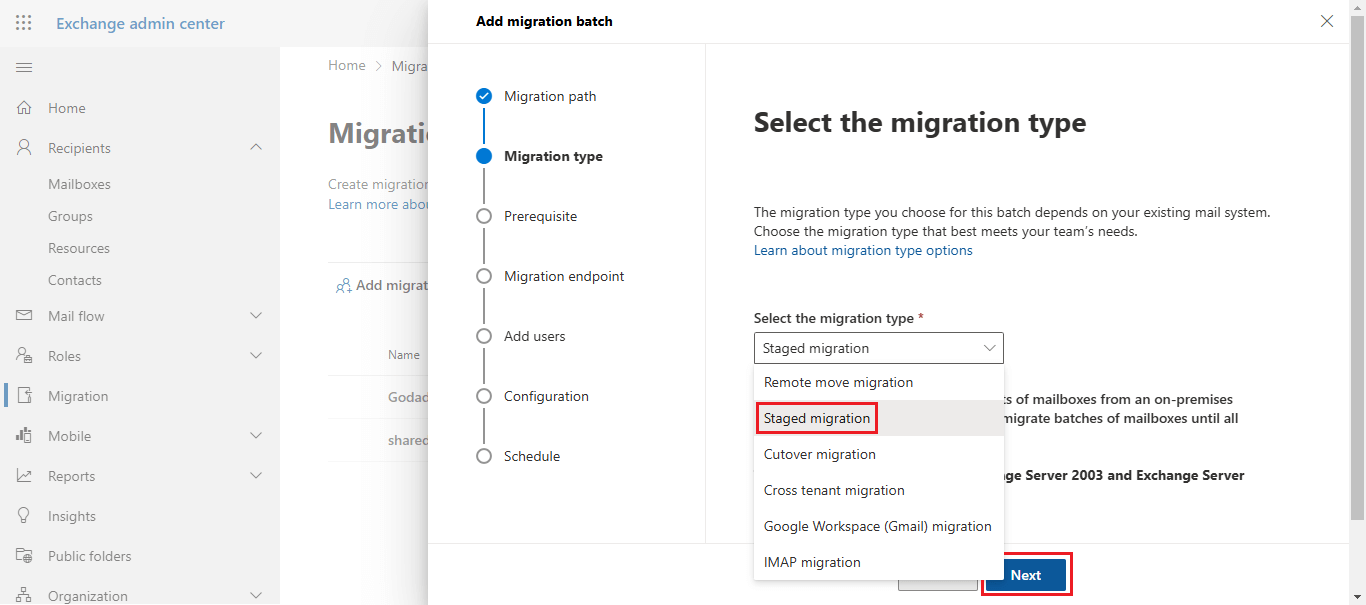
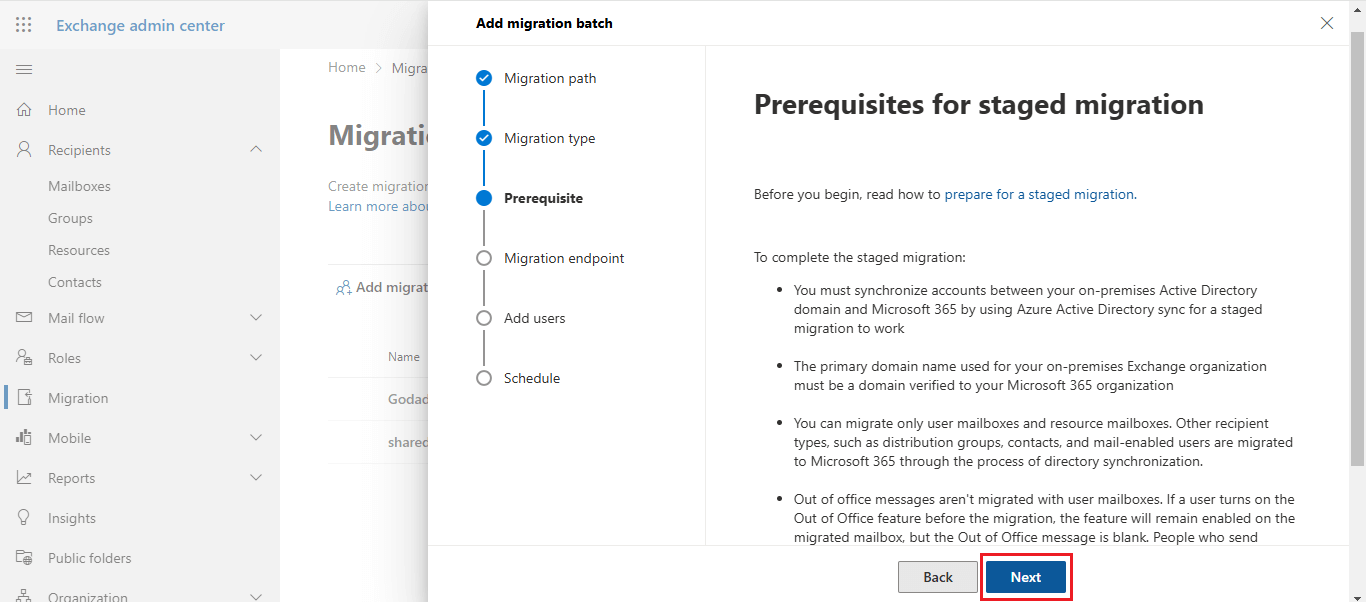
- Read the pre-requisites and click on next
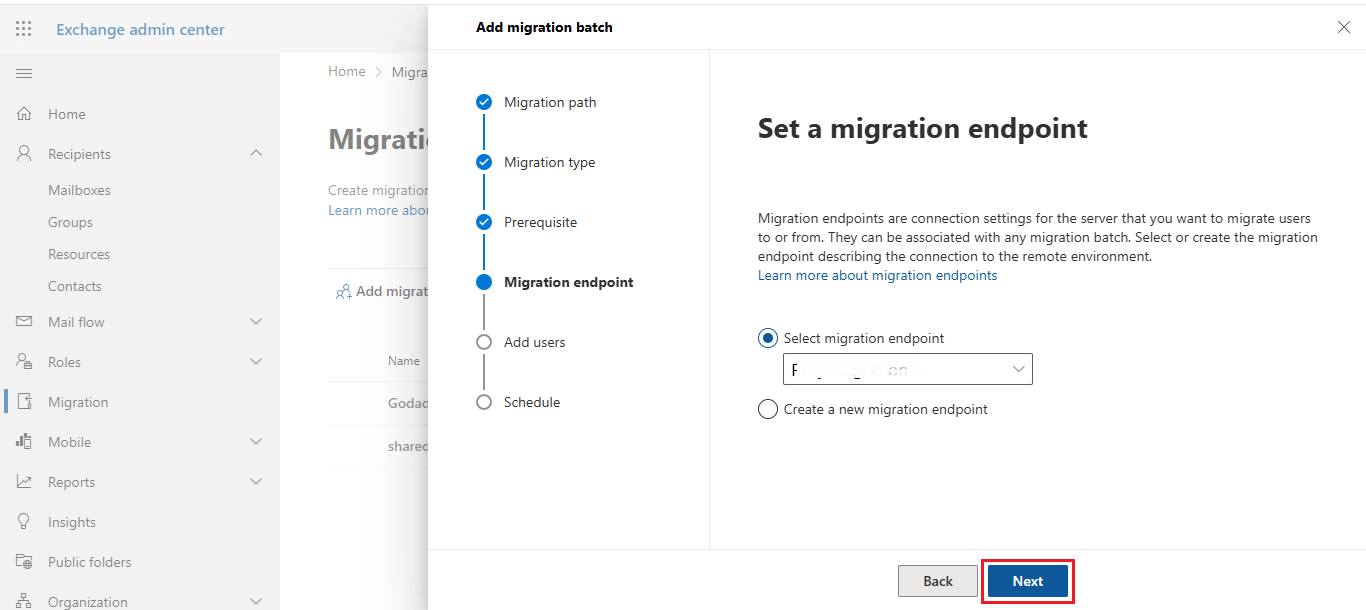
- Now select the migration endpoint and continue with Next. (If you haven’t created an endpoint yet, click the option below: create a new migration endpoint)
- To migrate in this batch, upload a CSV file with the list of users, and then click Next through the wizard, and start the migration
- Now, schedule your migration batch by entering the start and end times.
- Microsoft 365 will begin copying mail from the on-prem Exchange to Microsoft 365 for the selected users. Now, you can watch progress live in the Migration dashboard
Conclusion
The Exchange Staged Migration may seem complicated at first, but it becomes quite manageable once you carefully follow all the prerequisites. With the right preparation, you can migrate mailboxes smoothly and efficiently. However, during the staged migration process, users can continue to access their mailboxes without interruption, ensuring minimal disruption to daily operations. This method is ideal for organizations with a large number of mailboxes—typically up to around 150—and provides a structured approach to transitioning to Microsoft 365.
In this article, we’ve discussed the staged migration with the necessary permission and prerequisites. Any organization that wants to perform an Exchange to Office 365 migration step-by-step can follow this guide. This guide is designed to help you understand every aspect of staged migration and make your transition as seamless as possible.
More: Migrate Exchange Mailboxes to Office 365 – Cutover Migration


