Whether you’re an individual user managing their personal data or an administrator managing Multiple user accounts in an organization. Cyber threats are constantly evolving these days, so basic passwords are no longer enough to protect sensitive information. This is where Multi-Factor Authentication in Office 365 comes in.
But how does MFA work? MFA adds an extra layer of security by requiring a second form of verification, such as a code sent to your phone, in addition to your regular password. In this article, we’ll discuss the Multiple ways and step-by-step process of enabling or disabling Multi-Factor Authentication in Office 365.
Table of Content
How to Enable Multi-Factor Authentication in Office 365
Method 1: How to Enable MFA Office 365?
For Single User :
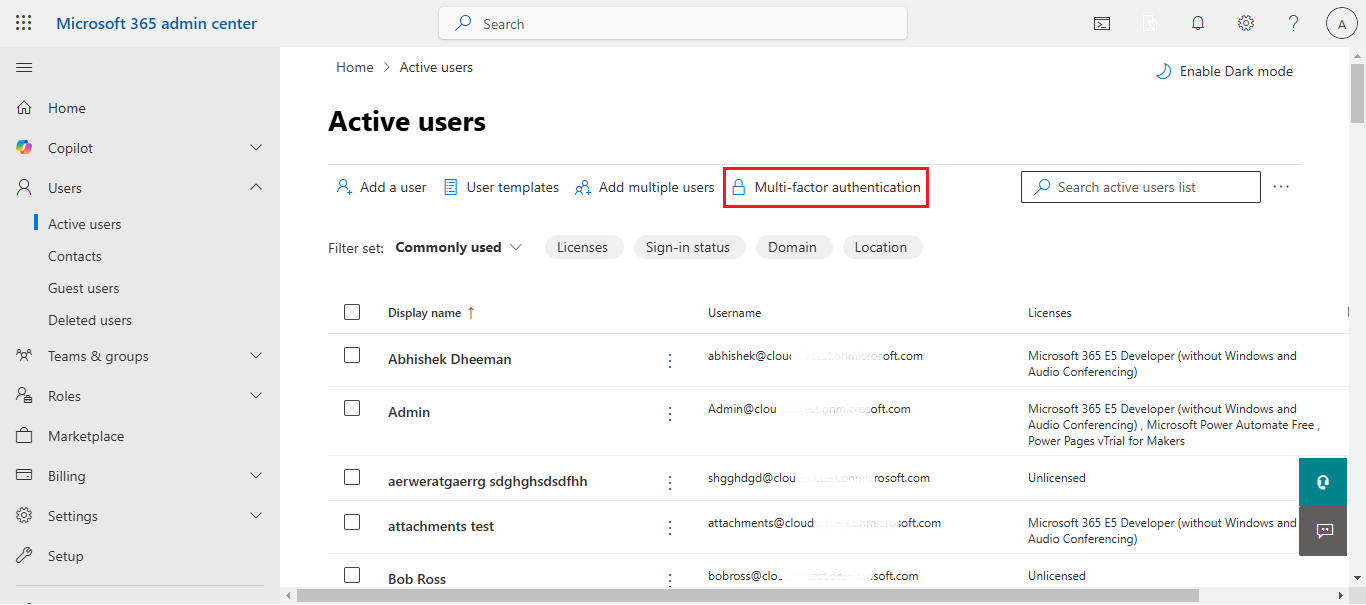
- First log into office 365 with admin Microsoft credentials then click on admin
- Go to Users then Active Users, Now click on Multi-Factor Authentication.
- To enable MFA, check the box in front of the user then click on Enable MFA
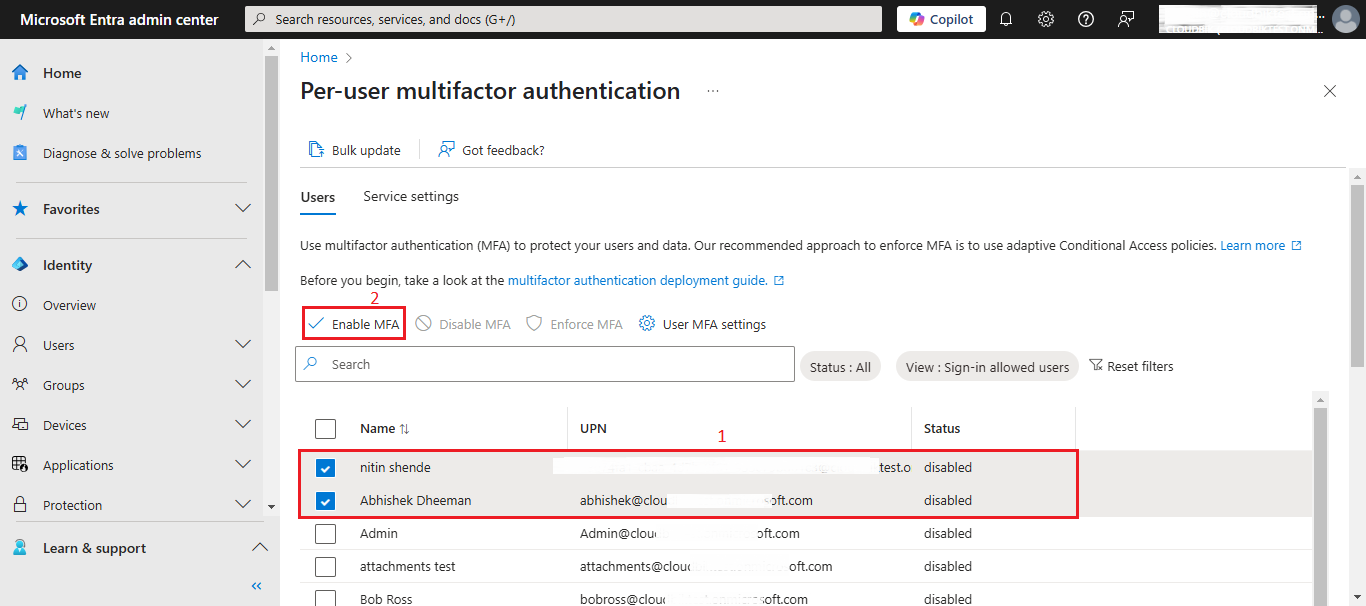
- A Confirmation pop-up will appear, click on Enable

- Now, you’ll see that the selected user’s Multi-Factor Authentication is enabled.

Enable the Multi-Factor Authentication in Bulk
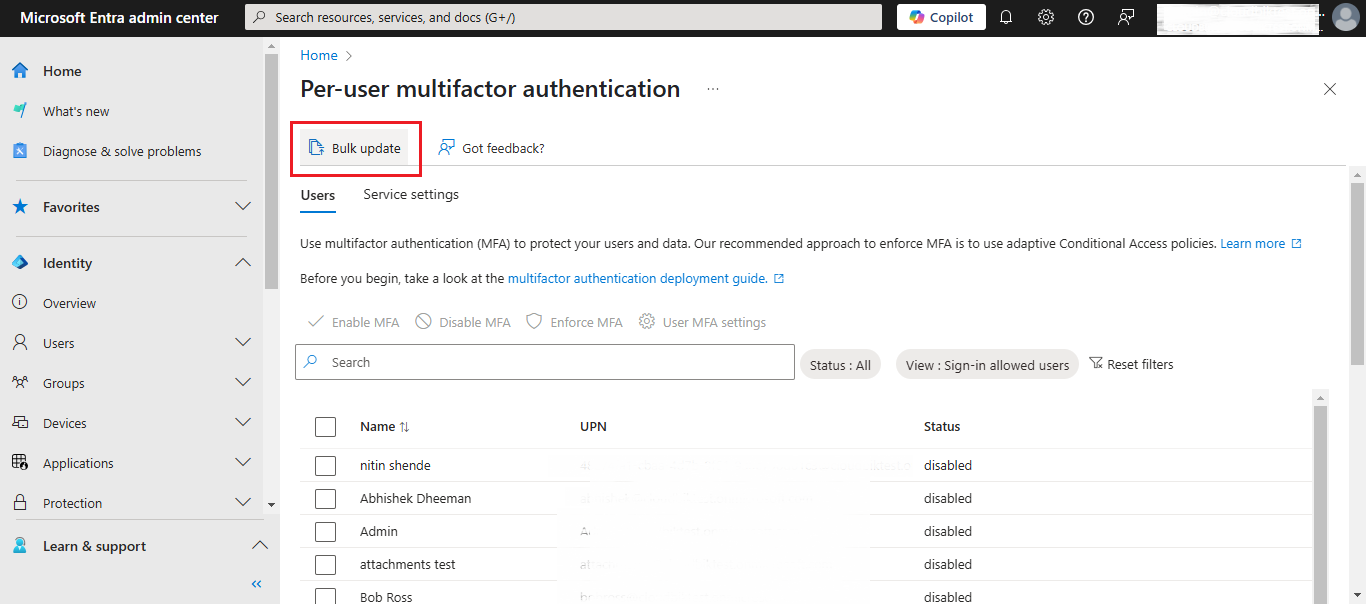
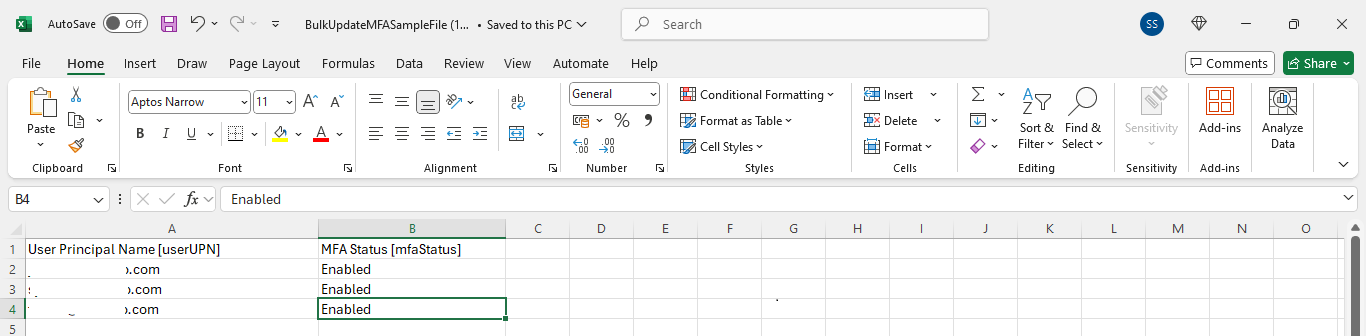
To enable the Multi-Factor Authentication in Office 365 for Multiple users, you’ll need to create a CSV file.
- Go to the Bulk Update option available on the MFA page.
- Download the CSV template and update the information as per your requirements.
- Browse the CSV file and upload it then click on the Submit button.
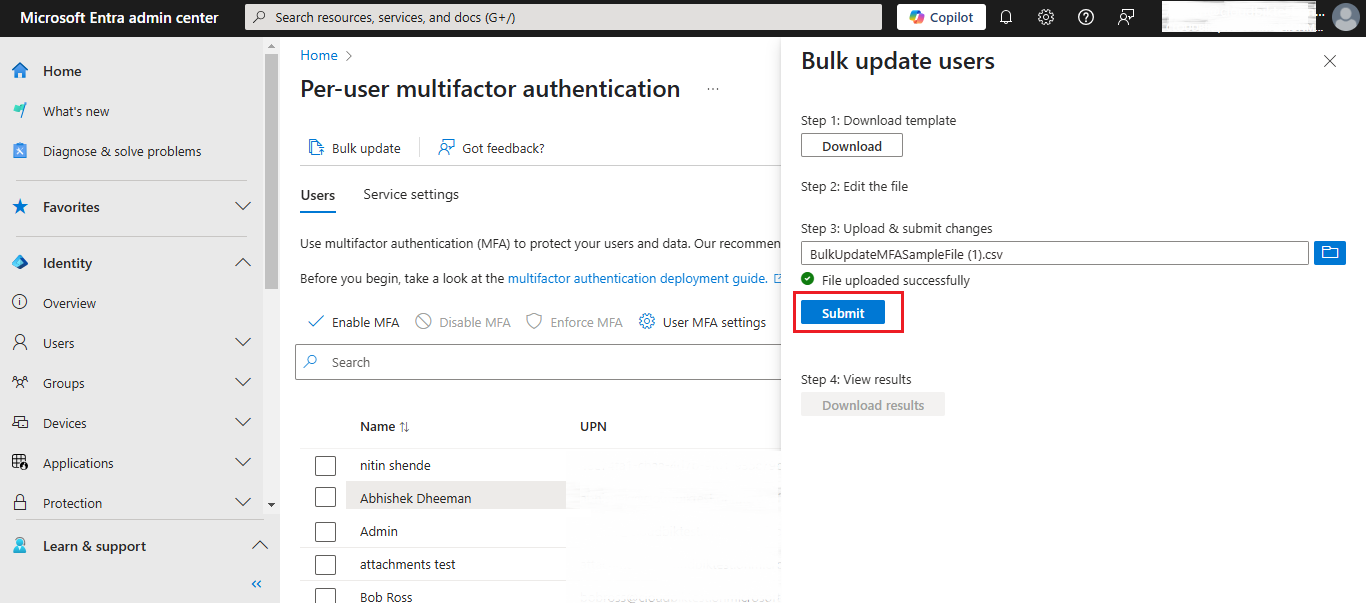
- The system will begin uploading the CSV file. If any errors occur, they will be displayed; otherwise, the data will be validated and submitted successfully.

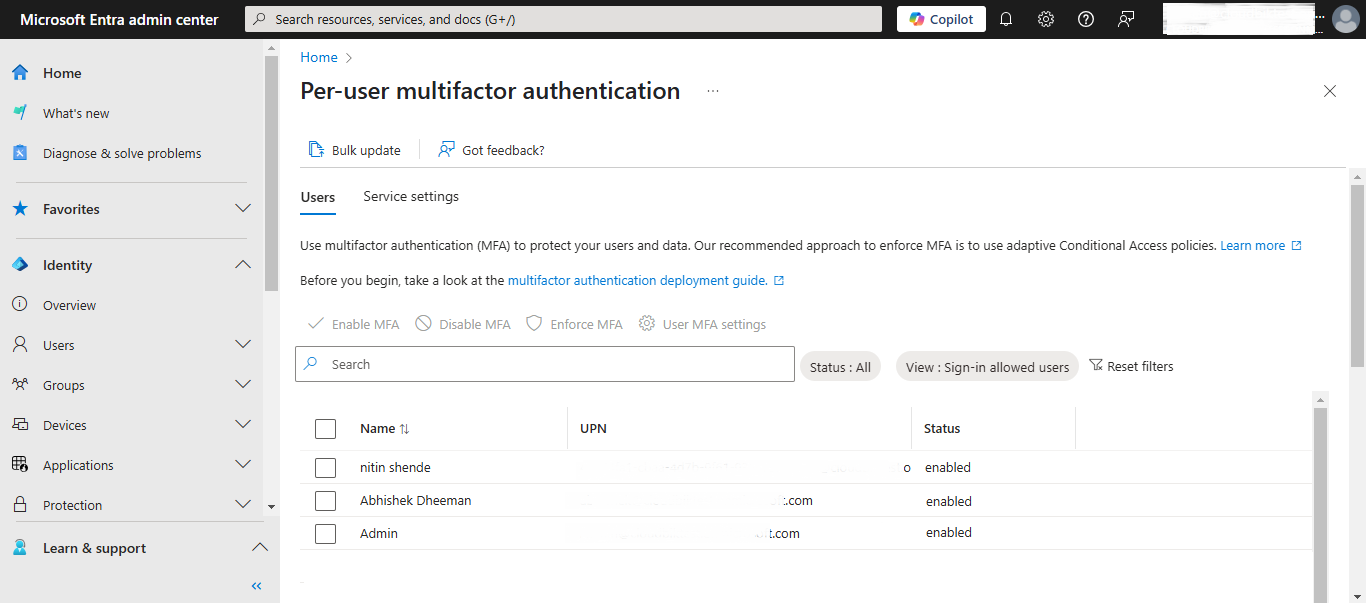
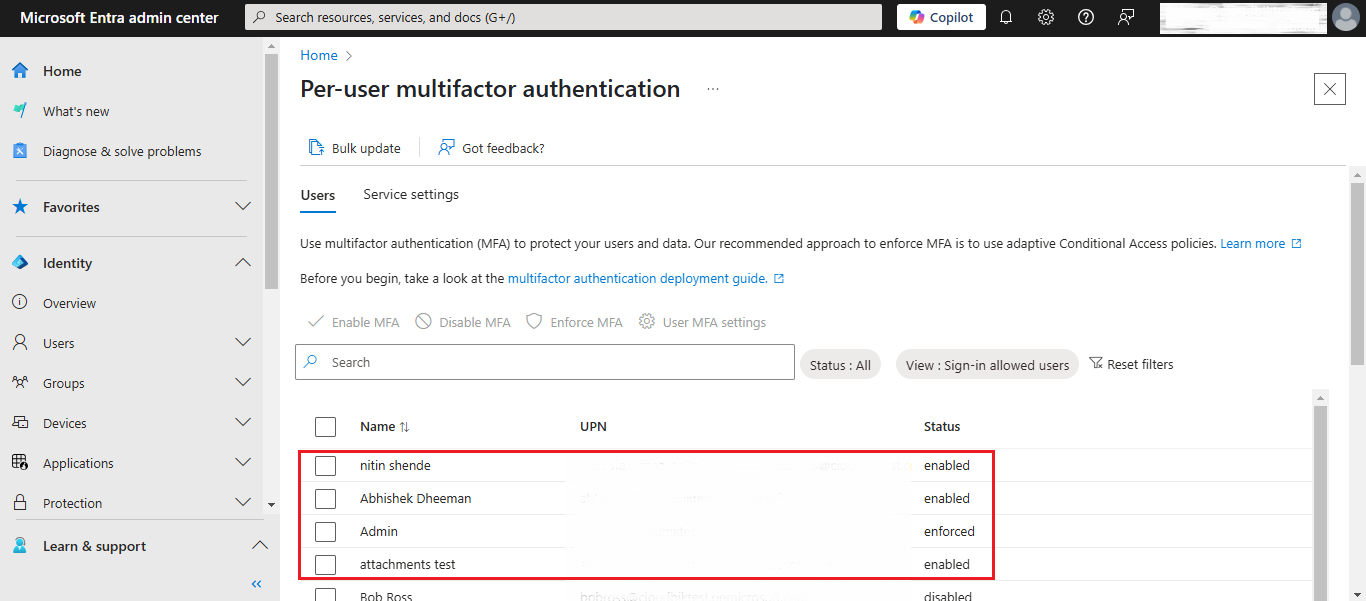
- You can see that listed user MFA has been enabled.
Method 2: Configure Multi-Factor Authentication Office 365 using the PowerShell
Step-1: First we need to Install the Microsoft Graph PowerShell Module which is Recommended.
- Open the PowerShell as Administrator and Run the below command:
Install-Module Microsoft.Graph -Scope CurrentUser
- A Confirm installation when prompted.
Step-2: Then we need to Connect to Microsoft Graph, Run the below command:
Connect-MgGraph -Scopes "User.ReadWrite.All", "Directory.ReadWrite.All"
- Sign in with admin credentials.
Step-3: Now, Install MSOnline Module for Per-User MFA, Run the below command:
Install-Module MSOnline
- Then Connect to MSOnline service, Run the below command:
Connect-MsolService
Step-4: Now, Enable the MFA for a User (Per-User MFA). To enable the MFA, Run the below command
Set-MsolUser -UserPrincipalName [email protected] -StrongAuthenticationRequirements @(@{RelyingParty="*";State="Enabled"})
Step-5: To Verify the Multi-Factor Authentication Status, Run the below command
Get-MsolUser | Select DisplayName, UserPrincipalName, StrongAuthenticationRequirements
In the above information, we discussed the methods for adding MFA for both single users and bulk users. We also covered how MFA can be enabled through the Office 365 portal as well as using PowerShell. Now, we’re moving to discuss “How to disable the Multi-Factor Authentication?”.
Disable the Multi-Factor Authentication in Office 365
Method 1: Turn off Multi-Factor Authentication Office 365
- First log into office 365 with admin credentials then click on admin
- Go to Users then Active Users, Now click on Multi-Factor Authentication.
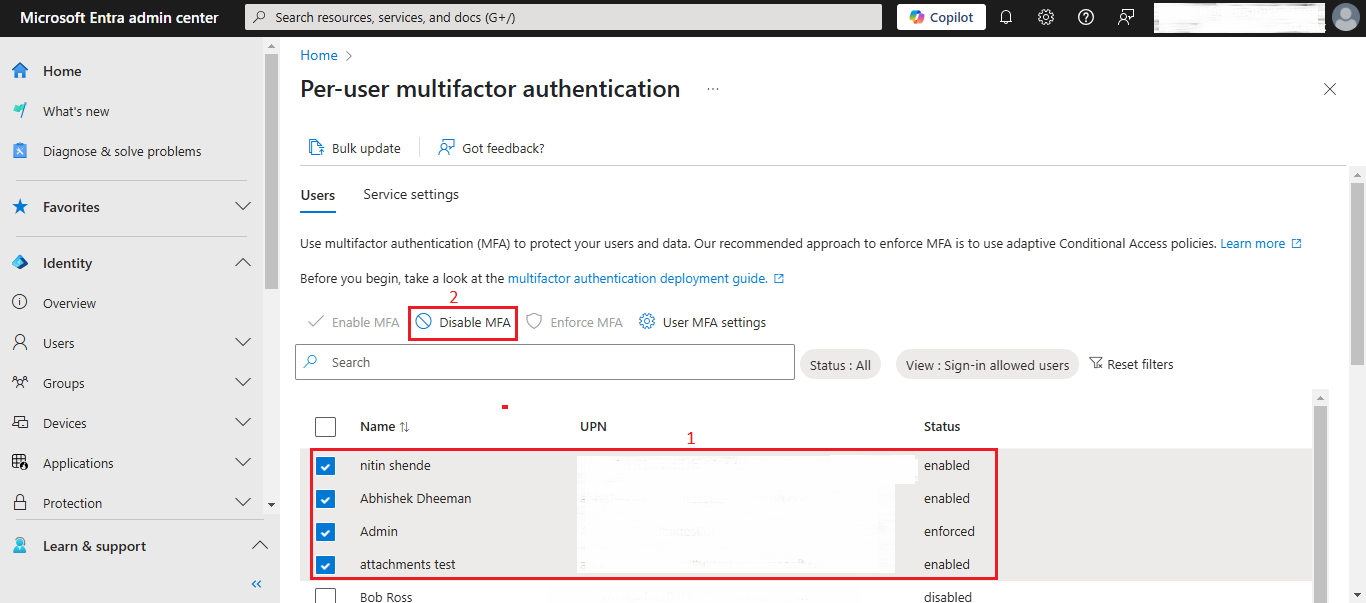
- Now, you’ll see the enabled users.
- To disable the user, first select the user then click on Disable MFA option.
- A confirmation message pop-up will appear, click on disable.
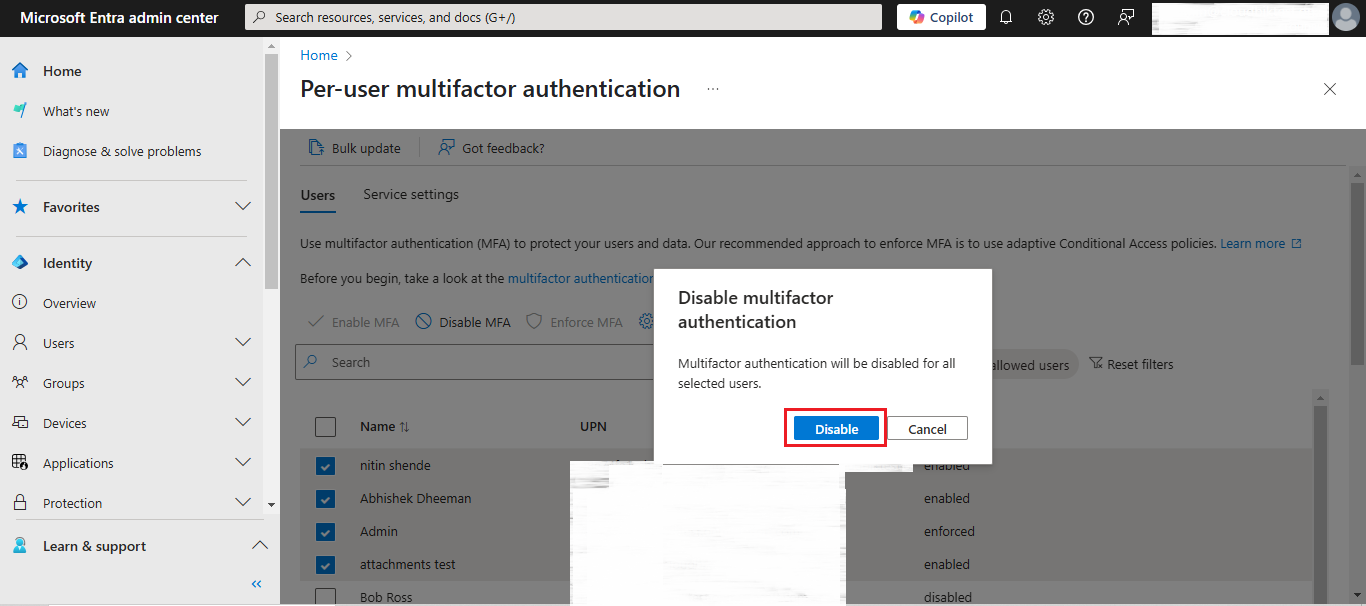
- Now, you can see that the user’s are disabled successfully.

Method 2: How to Disable MFA Using Windows PowerShell
Step-1: Install the MSOnline module, if not already installed:
Install-Module MSOnline
Step-2: Connect to Microsoft Online Services:
Connect-MsolService
- You will be prompted to sign in with your Office 365 admin credentials.
Step-3: Disable MFA for the user:
Set-MsolUser -UserPrincipalName [email protected] -StrongAuthenticationRequirements @()
Step-4: Verify that MFA has been disabled:
Get-MsolUser -UserPrincipalName [email protected] | Select-Object DisplayName, StrongAuthenticationRequirements
Conclusion
Multi-Factor Authentication in Office 365 is an important and essential part of the security feature in Office 365. MFA helps protect user accounts from unauthorized access by adding an additional layer of verification. In this article, we have discussed Multiple ways to enable or disable MFA using the Office 365 admin center and PowerShell. Whether you are managing a single user or performing bulk updates, Office 365 provides flexible options to configure MFA according to your organizational needs. Regular review and management of MFA settings ensures better security compliance and keeps your Office 365 environment safe from potential threats.
Read More:


