With Microsoft 365 accessible across all platforms—PCs, tablets, and mobile—Office 365 has become a preferred solution for users seeking flexibility and productivity. Along with its regular updates, enhanced security, seamless migrations, and innovative apps, Office 365 enables users to work smarter. However, moving to Office 365 often begins with an empty mailbox, leading to the need to import old emails. This question will arise, how can PST files be uploaded into Exchange Online OWA accounts?
Some common queries from users include:
- I want to move all my agents’ Outlook PST files to Office 365 so I can grow my business globally. Can you share a quick and simple way to do this?
- I also want to use Outlook in the cloud so I can access it from anywhere. Is there a way to import my desktop Outlook data into Office 365?
- How can I upload my Outlook 2007 PST files to an Office 365 account for free? Is there a manual method I can use? I need to transfer the PST files to Office 365 as soon as possible.
To help users address these concerns, this guide outlines two effective methods to import PST files from Outlook 2007, 2010, 2013, 2016, and 2019 into Office 365. Let’s dive into the details of each method step by step.
Table of Content
1:- Import PST to Office 365 Using Azure Storage (Network Method)
The Network Upload method, recommended by Microsoft, is a widely-used approach for transferring archived PST files into Outlook 365 OWA. It’s completely free and doesn’t require any third-party tools or paid applications. By following the latest guidelines step-by-step, users can seamlessly import pst to office 365.
a) Assigning the Mailbox Import Export Role in Office 365
First, the administrator needs to assign the Mailbox Import Export role. Here’s how to give the required permissions:
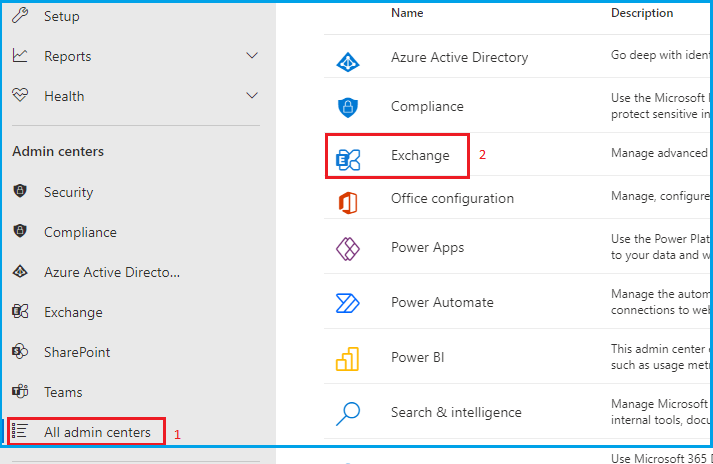
- Log in to your Microsoft Office 365 Admin account and go to the Admin Center.

- Select All Admin Centers and click on Exchange to open the Exchange Admin Center.
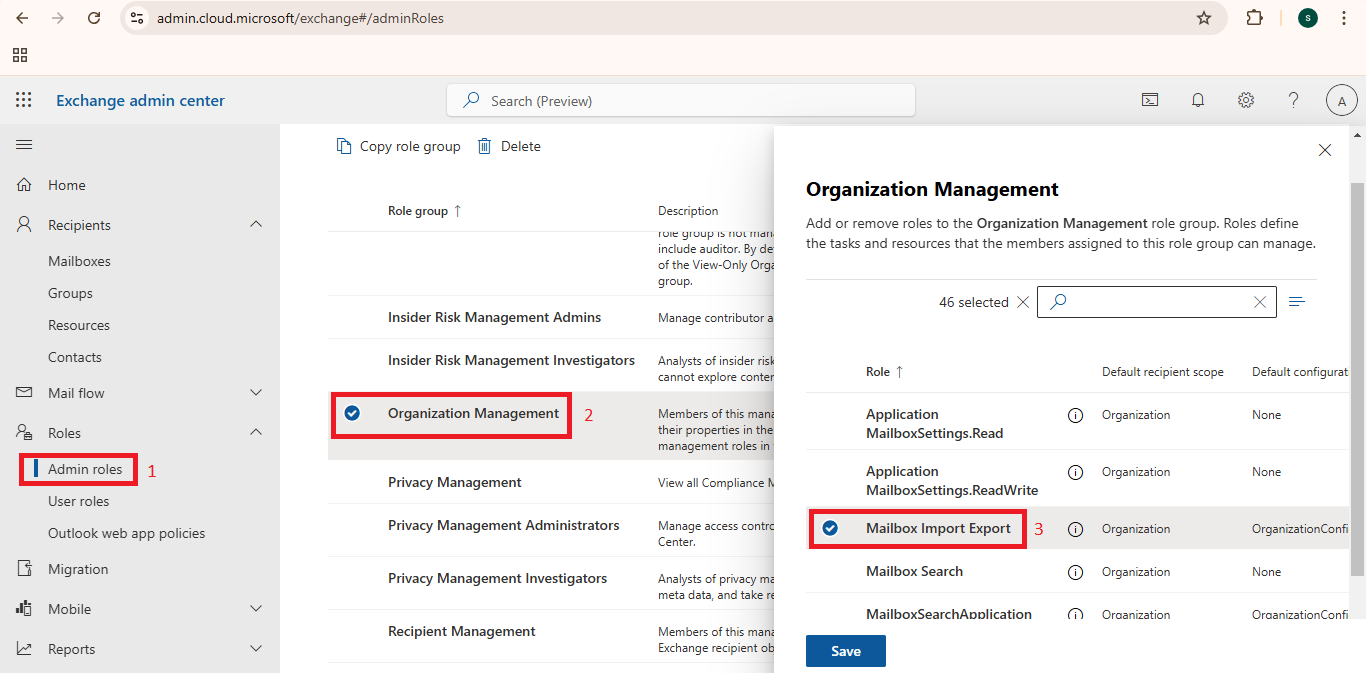
- Switch to the Exchange Admin Center, go to the admin roles tab, and click on Organization Management. In the permission section, select Mailbox Import-Export, click save.
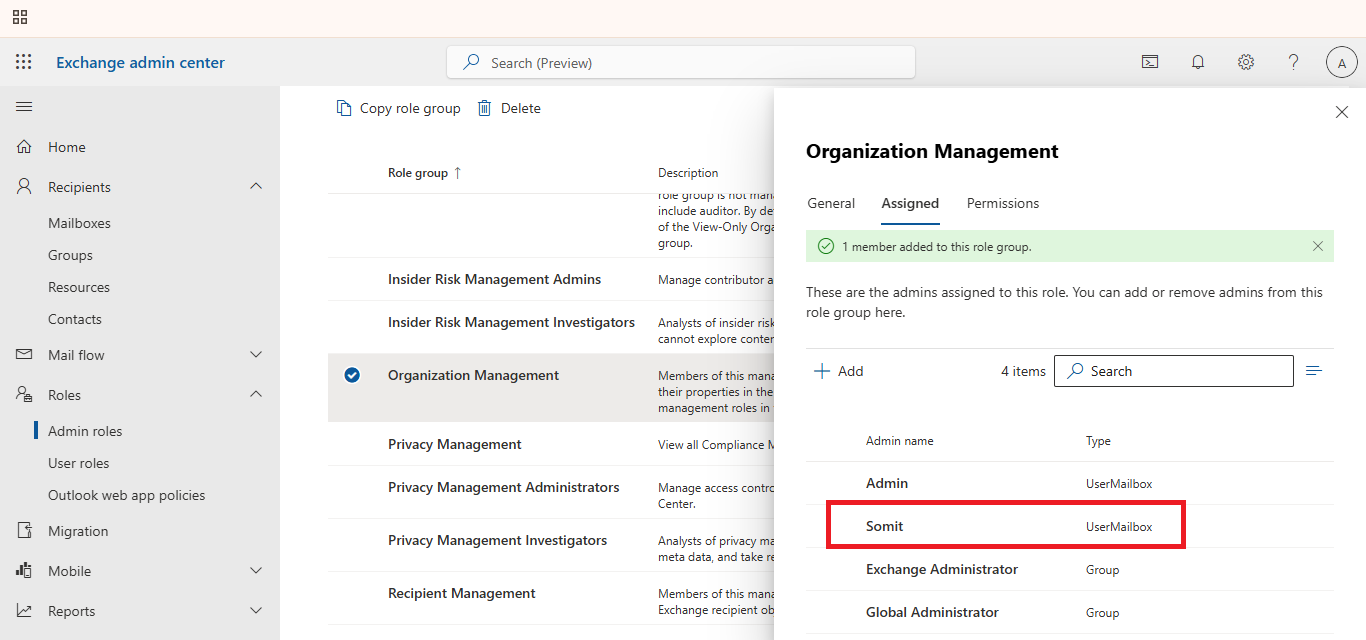
- Under the Assigned section, click the + sign again to select the user for whom you want to create the import-export session.
b) Create a Job and Upload the PST File
Start by opening the Microsoft 365 admin center & then go to Compliance. Follow the listed steps to proceed with creating a job and uploading your PST file.
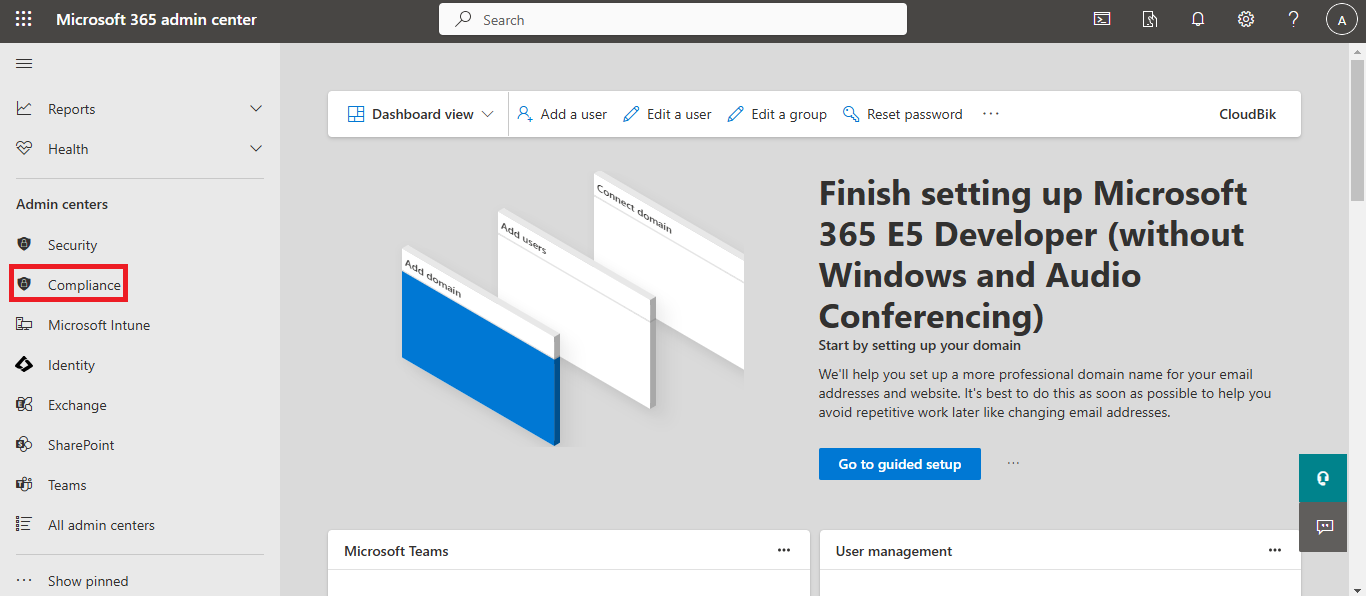
- Navigate to Data Lifecycle Management and select Import, then click on New import job
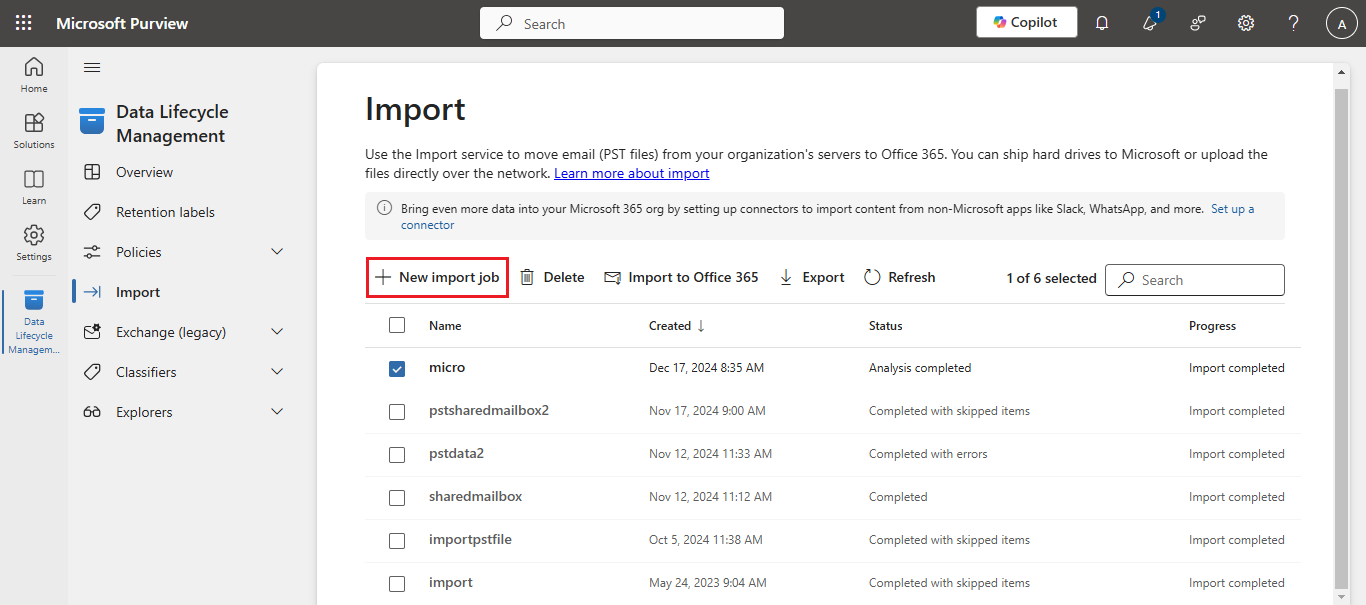
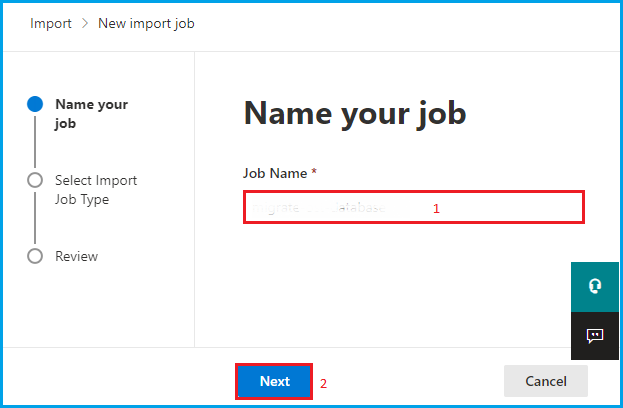
- Click New Import Job, type a name for the job, and click Next.
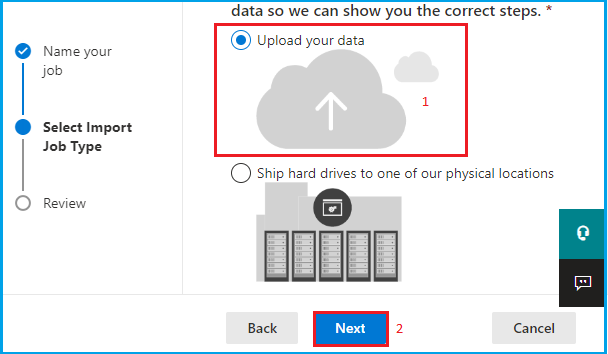
- Select the Upload your data radio button and proceed by clicking Next.
- In the Data Import section (Step 2), click Show network upload SAS URL, then copy the SAS URL that appears and save it securely.
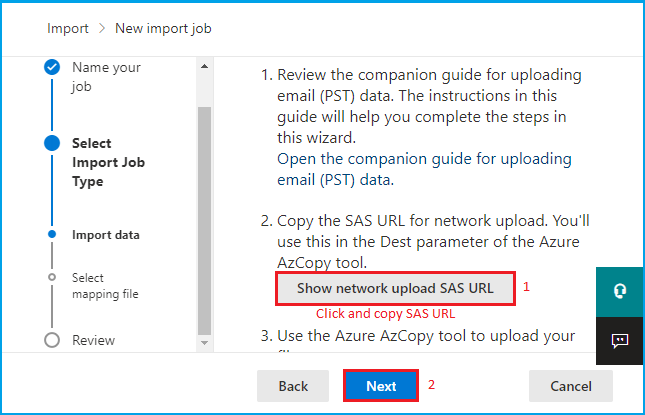
- Now, Download and install the Azure AzCopy Storage Tool. After installation, run the tool using the command below and Press Enter to execute.
AzCopy.exe/Source:”\\Give PST File Network Path”/ Dest:“Pest SAS URL” /V: “give the location to save log file\log”/Y

- In Step 4, enable both options: I’m done downloading my files and I have access to the mapping file, and click Next.

- Upload the CSV file by clicking + upload file, validate the file to ensure there are no errors, and press Save after successful validation.
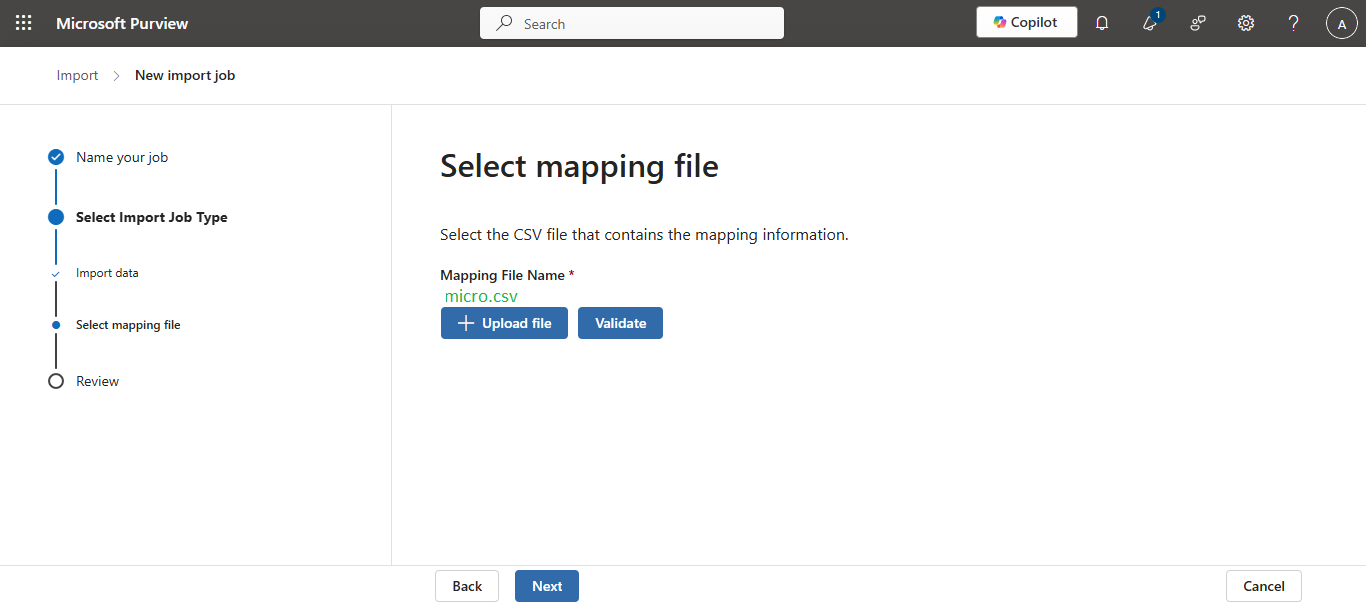
- The file import job will be added. Refresh to check the status.

- Once complete, select your uploaded PST file.
- Click the Import PST to Office 365 button.
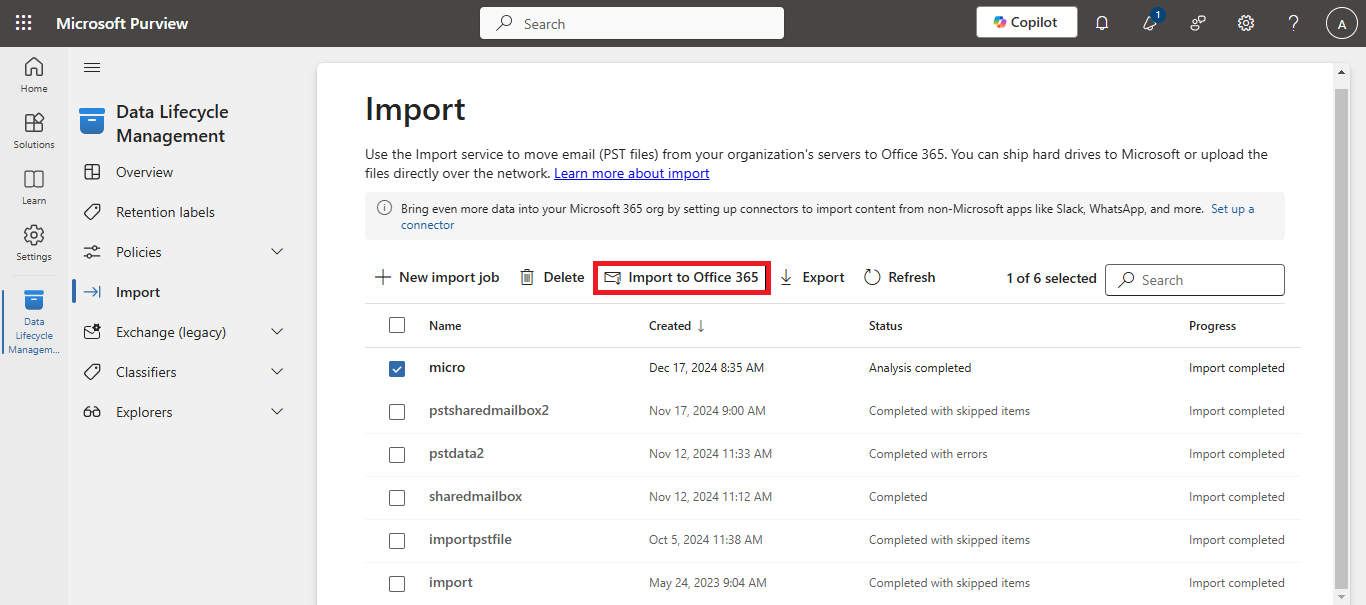
- When prompted with data filters, choose No, I want to import everything, and proceed.
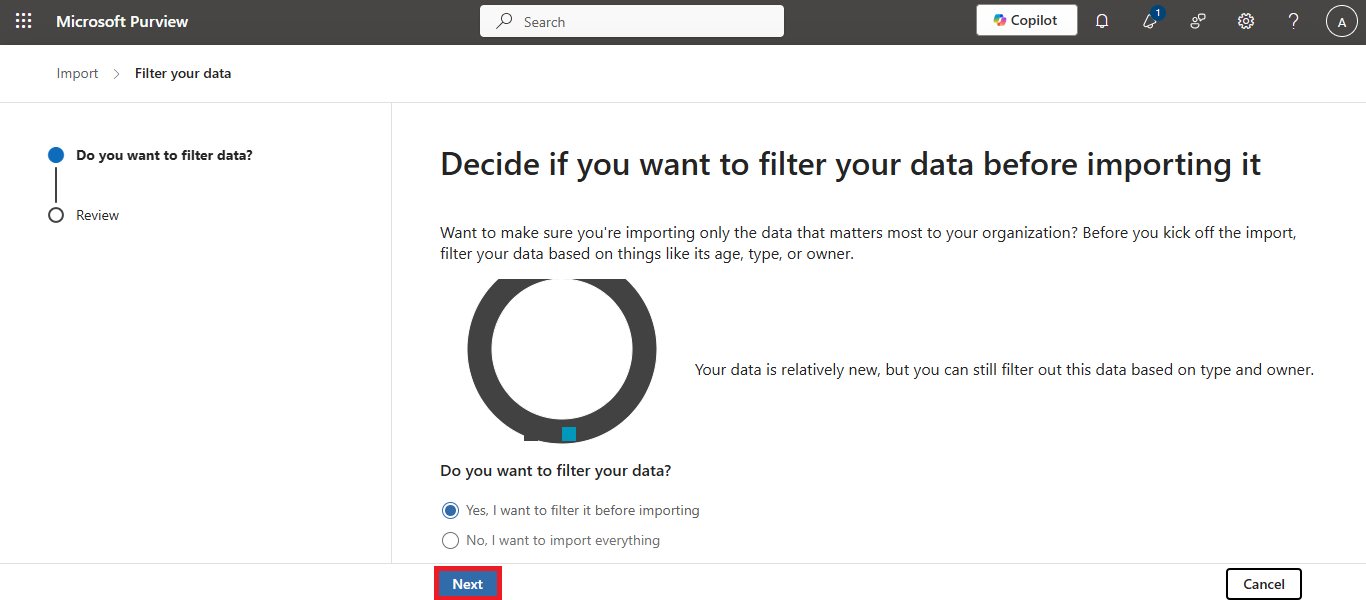
- Review the database details for import, then click Import Data.The PST file database will now be uploaded and imported into the Office 365 account.
2:- Import PST to Office 365 Using the Import/Export Method
Microsoft provides an alternative solution to migrate PST files into Exchange Online using the Import/Export feature. This method is particularly useful if the Network Upload approach does not yield desired results. By following the steps outlined in this technique, users can efficiently transfer their old Outlook data files into Office 365 mailboxes with just a few clicks.
a) Configure Office 365 Account in Outlook
This method involves setting up your Office 365 account within Outlook. Follow these steps to get started:
- Open Outlook and navigate to the File tab.
- Select Add Account, and in Outlook 2016 or 2019, a new window will appear.
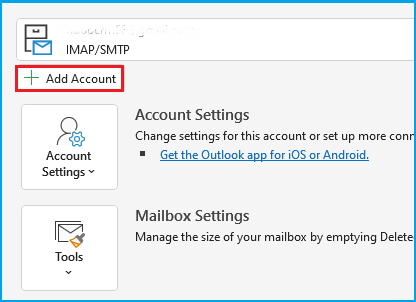
- Enter your Microsoft User ID, select Let me set up my account manually under Advanced options, and click Connect.

- When the Advanced Setup screen appears, select Microsoft 365. Enter your password and click Sign in.
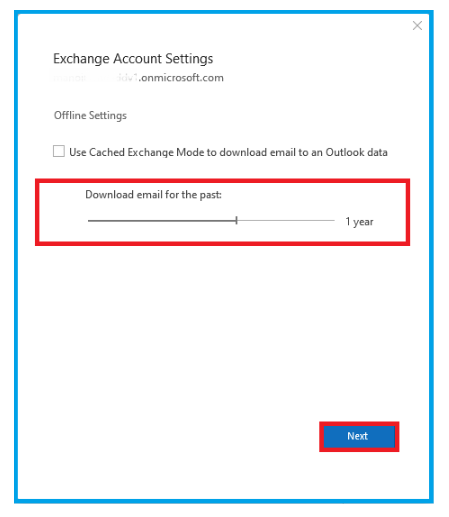
- Confirm the Cache Exchange Mode setting, Enable it if you want a local backup of your data otherwise Disable it if no local backup is needed. Click Next, then click Done to finish the setup.
b) Import PST to Office 365 Account
- Restart Outlook and click on Add File. Then, navigate to Open & Export, click the Import/Export option.
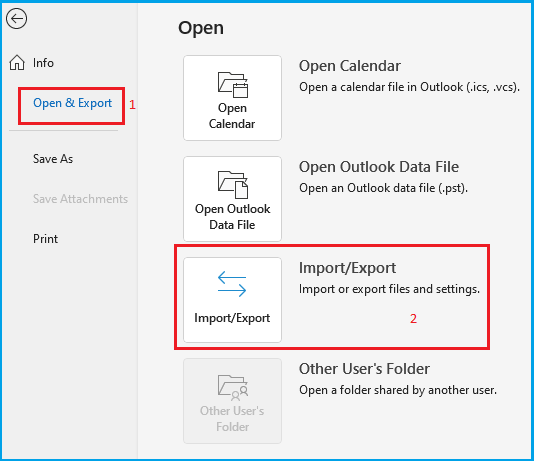
- In the Import and Export Wizard, choose Import from another program or file, and then click Next.

- Select the Outlook Data File (.pst) option, then click Next to continue the import process.
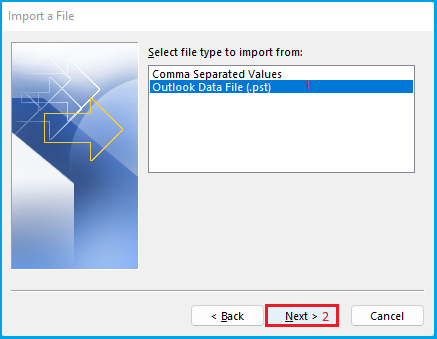
- Browse to find the PST file you wish to import, select “Replace duplicates with items imported,” and then click Next to proceed with the process.
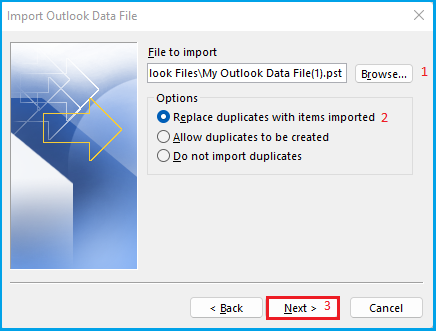
- Check the Include Subfolders option and choose Import items into the same folder in:.Select your Microsoft Office 365 account and click Finish.

- All data will sync, and you can now access your PST data in your Office 365 cloud account.
Note: If neither of these methods works for you, consider using a reliable third-party PST to Office 365 migration tool. Such tools ensure a safe and efficient transfer of Outlook PST files to your Microsoft 365 account.
Best Practises for PST to Office 365 Migration
- Evaluate the size and location of PST files to choose the most suitable migration method.
- Always keep a backup before starting the migration process to avoid potential data loss.
- Ensure proper roles and permissions are assigned to streamline the migration process.
- Verify that all data has been successfully transferred after completing the migration.
- If manual methods fail, consider a trusted third-party tool for safe and efficient migration.
Conclusion
In this guide, we have covered two detailed methods for import pst to office 365, the Network Upload method and the Import/Export method. Each approach offers a step-by-step process to transfer data securely and efficiently, ensuring users can access their old emails in Exchange Online OWA. While the Network Upload method is ideal for large-scale migrations with no additional tools, the Import/Export method is a practical choice for manual uploads via the Outlook client.By following the outlined techniques, you can easily ensure a successful transition to the Microsoft 365 environment. For any questions or further assistance, feel free to share in the comments section.
