Controlling email attachment sizes in Office 365 is essential for efficient communication, particularly when sending large files. Although, Microsoft Outlook limits the size of attachments you can email by default. In order to effectively deliver larger files, we’ll show you how to raise the Outlook attachment size limit in Office 365 in this article.
Table of Content
- 1 Understanding What Is Outlook Attachment Size Limit
- 2 Why Does the Outlook Attachment Size Limit Matter?
- 3 Ways to Increase Outlook Attachment Size Limit in Outlook for Exchange Online:
Understanding What Is Outlook Attachment Size Limit
Before attempting to increase the attachment size limit in Outlook for Office 365, you should first understand what the default size restriction is and how it affects your ability to transmit large files. However, For emails sent via Outlook or Office 365, the standard attachment limit is often 25 MB. Although, If your file size exceeds this restriction, Outlook will block you from transmitting it.
Why Does the Outlook Attachment Size Limit Matter?
It is common for professionals to send and receive large files such as presentations, spreadsheets, or high-resolution photos. However, If you frequently work with large files, the default attachment size limit may be too restrictive. Raising this restriction will allow you to save time and effort when transferring important documents with colleagues, clients, or customers.
Ways to Increase Outlook Attachment Size Limit in Outlook for Exchange Online:
You can increase the outlook attachment size limit in two ways: using the Exchange Admin Center and Windows PowerShell. We’ll walk you through both methods of extending the email attachment size limit.
1) Increase Outlook Attachment Size Limit in Office 365 Admin Center
To increase the size of attachments you send and receive, the first thing you need to do is Increase outlook attachment size within the Office 365 admin center :
- Open your web browser and go to the Office 365 Admin Center. Sign in with your administrator credentials.
- In the Admin Center, go to Exchange from the left sidebar.
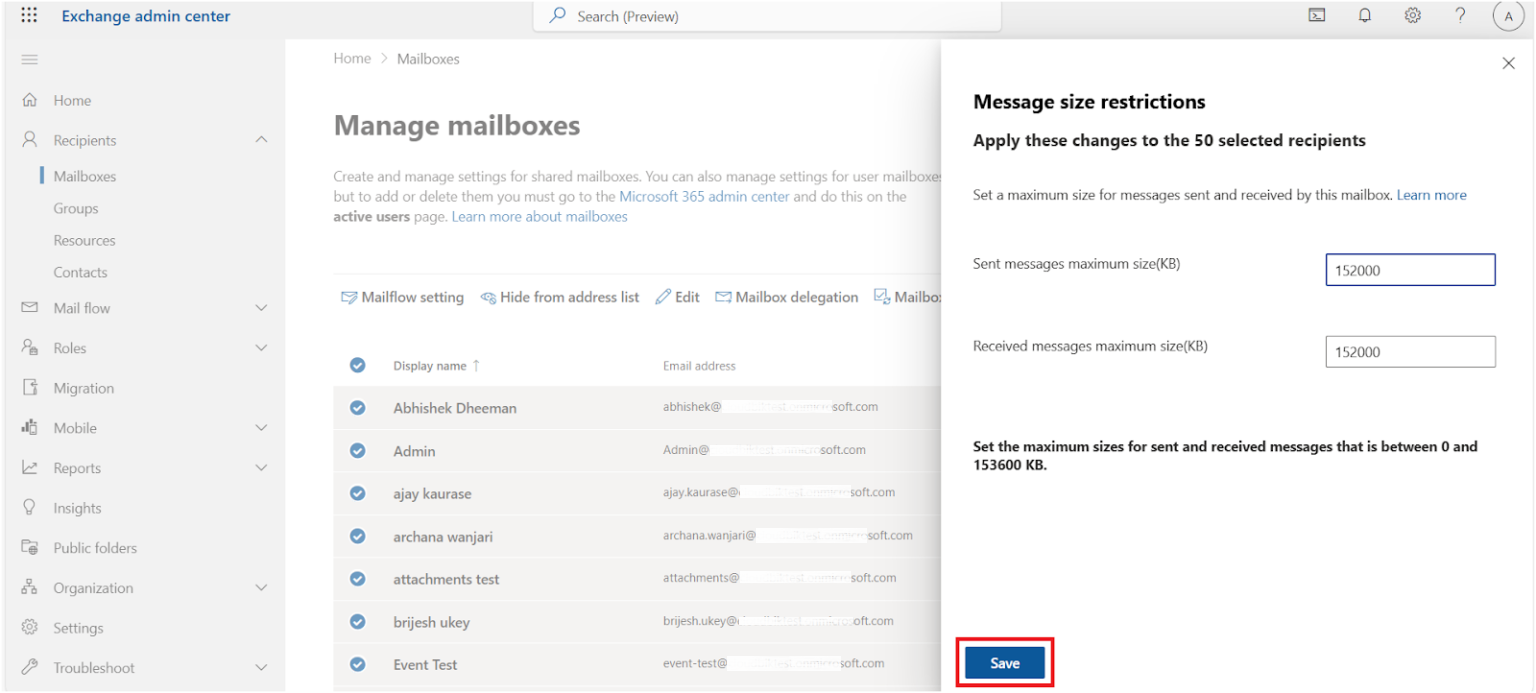
- After you log into the exchange admin centre, you’ll see all the mailboxes in your Office 365 account. Choose one or more mailboxes, then click on Mailflow settings and select Message Size Restrictions.
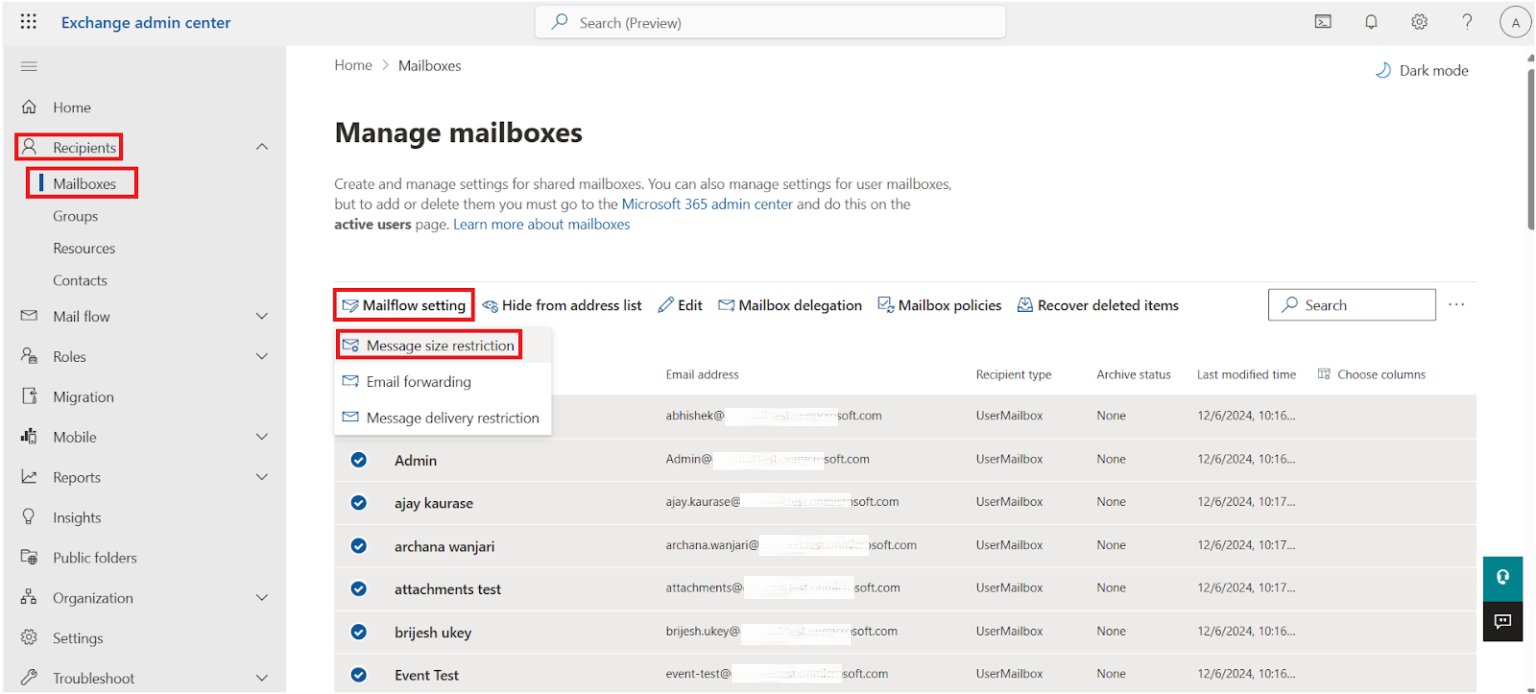
- A new window will open on the right side. Here, you can set the maximum size for both sent and received messages. After selecting the size, click on Save button. I’m setting the limit to the maximum, but you can choose any size between 0 and 153600 KB based on your needs.
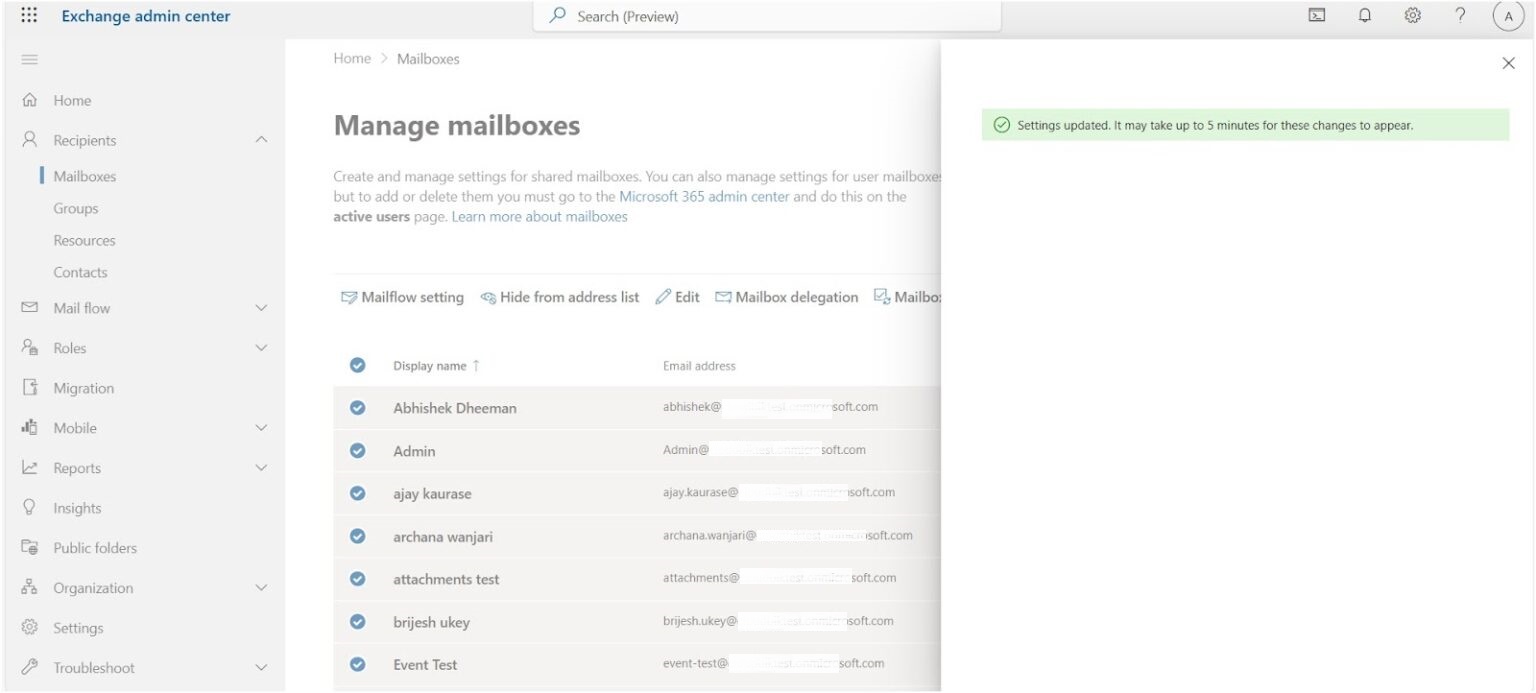
- Once you click Save, you’ll see a confirmation message saying that the settings have been updated.
2) Increase Outlook Attachment Size Limit Using PowerShell
For administrators managing multiple users or for more advanced configuration, PowerShell is a powerful tool for increasing the attachment size limit in Office 365. You can use Exchange Online PowerShell to configure mailbox size limits for one or more users. Here are the steps for doing this:
- Open Windows PowerShell as Administrator.
- Run the following command and log in using your admin username passwords to connect to Exchange Online:

- Once connected to Exchange Online, run the command based on whether you want to set the size limit for a single mailbox, multiple mailboxes, or all mailboxes. I will share the commands for each option.
– For Single Mailbox:
Set-Mailbox -Identity EmailAddress -MaxSendSize 150MB -MaxReceiveSize 150MB
– For Multiple Mailboxes:
(“mailbox1”,“mailbox2”)|%{Set-Mailbox –Identity $_ -MaxSendSize 150MB -MaxReceiveSize 150MB}
– For All MailBoxes
Get-Mailbox -Resultsize Unlimited | Set-Mailbox -MaxReceiveSize 150MB -MaxSendSize 150MB.
Best Practices for Sending Large Files in Office 365:
Once you’ve increased the attachment size limit, try the following suggestions to improve your file sharing process:
1. Use Cloud Storage Solutions
While raising or increasing the attachment size limit enables you to send bigger files, it’s generally more efficient to utilize onedrive or sharepoint for sharing large files. Moreover, these cloud storage platforms provide enhanced flexibility and guarantee that your recipients can effortlessly access the file without concerns about attachment size restrictions.
2. Compress Files Before Sending
If you’re still encountering problems with attachment size limits, employing tools like winrar or zip to compress files can effectively reduce their overall size before sending them through outlook.
3. Split Large Files into Smaller Segments
An alternative approach is to divide large files into smaller segments and transmit them separately. Although, this can be achieved by utilizing file-splitting software or by sending multiple emails with smaller attachments.
Conclusion
By increasing the outlook attachment size limit in office 365, you can enhance your productivity by enabling the direct transfer of larger files via email. Whether you enhance the limit by utilizing the office 365 admin center or employ powershell for automated adjustments, the process is uncomplicated and can be tailored to suit your organization’s requirements.
FAQ
Q1. Outlook attachment not opening on double click?
A1. If Outlook attachments are not opening when double-clicked, you can try these solutions:
Check File Associations, Disable Add-ins, Check Antivirus Settings, Update Outlook, Repair Office Installation, Check Outlook File Block Settings, Clear Cache, Rebuild Outlook Profile, Open Attachment Outside Outlook
Q2. Outlook attachment preview not working?
A2. Outlook’s attachment preview isn’t functioning, consider the following steps:
Enable Previews, Update Outlook, Default App Check, Clear Cache, Repair Office
Q3. Why outlook is in email body?
A3. If attachments appear in the email body instead of the usual attachment field in Outlook, it’s likely due to the email format. Outlook uses three formats for composing emails:
- Plain Text
- Attachments are listed in the attachment field, not inline.
- HTML
- Attachments also appear in the attachment field.
- Rich Text Format (RTF)
- Attachments are embedded within the email body as icons.
Solution:
To fix this, switch the email format to HTML or Plain Text:
- Open the email.
- Go to Format Text in the ribbon.
- Select HTML or Plain Text.
This will move the attachments to the standard attachment field.
Q4. Why does Outlook attachment say download failed?
A4. If Outlook shows “Download Failed” for attachments, it could be due to several reasons:
A weak connection can interrupt the download process, Attachments that are too large may not download, Security software like antivirus can block attachments from downloading, The email server may be temporarily down, The attachment itself may be corrupted or incomplete.
To resolve the issue:
- Restart Outlook.
- Clear cache or repair Outlook via Control Panel.
Q5. Where are outlook attachment files stored.
A5. Outlook attachment files are stored in different locations depending on how they are handled:
- For Cached Attachments:
- Location: C:\Users\[YourUsername]\AppData\Local\Microsoft\Outlook
- These files are stored temporarily for offline use and are usually removed when you close Outlook or the attachment is deleted.
- For Downloaded Attachments:
When you manually download attachments, Outlook saves them to your default Downloads folder, unless you specify a different location during the download process.\
- For Attachments in PST/OST Files:
- Location: C:\Users\[YourUsername]\Documents\Outlook Files\
Remember, attachments can also be stored wherever you choose if you manually save them to a specific folder.
